Instrukcja instalacji krok po kroku dla programu pilotażowego 1
Zainstalowanie i skonfigurowanie Easierphone na urządzeniu zajmie około 15 minut. Poniższy przewodnik pokazuje wszystkie kroki (1-50) wymagane do pełnej konfiguracji.
Pobieranie i instalacja
1.
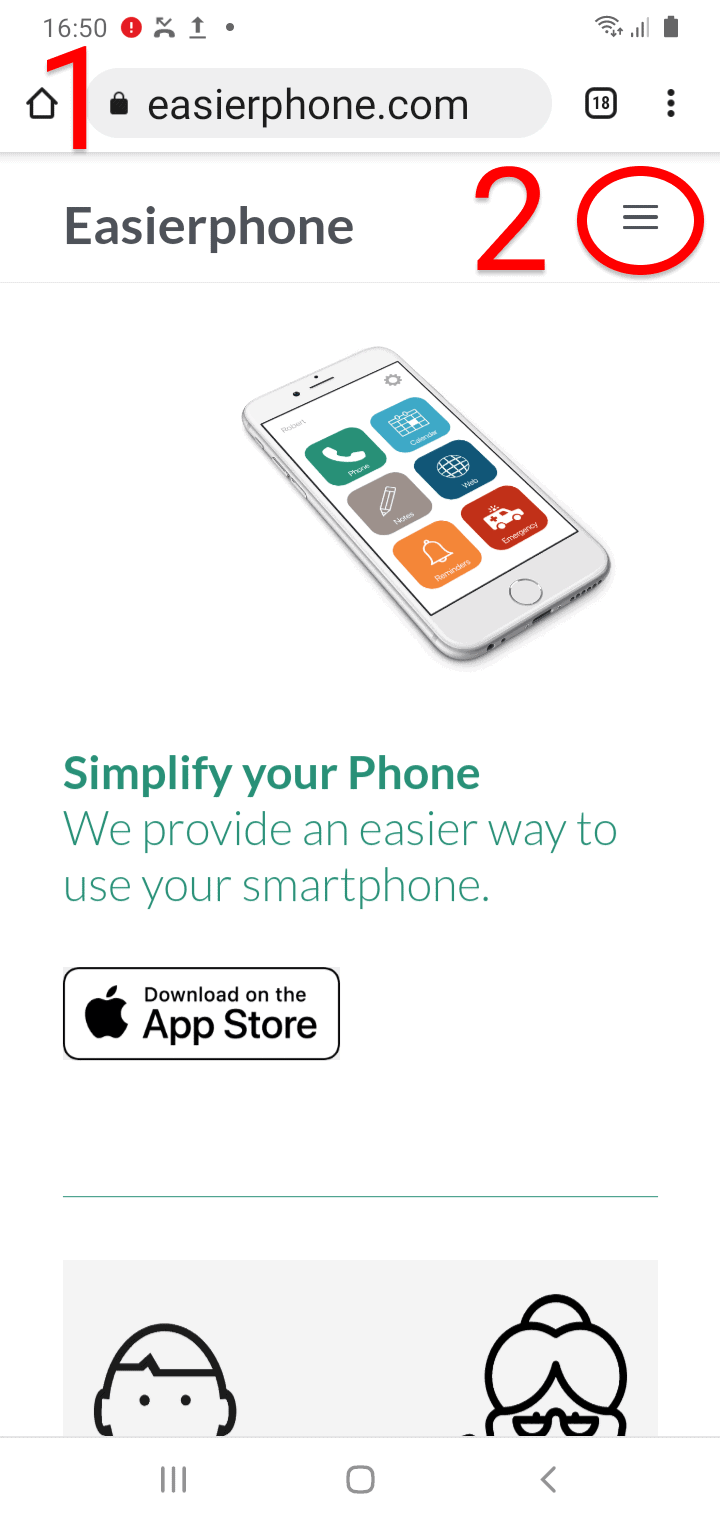
Using the browser on the Android phone you want to install Easierphone on, please navigate to easierphone.com
2.
On easierphone.com, open the hamburger menu in the top right corner
3.
Navigate to:
AAL PROGRAMME
PILOT PROGRAMME 1

4.
Enter the password: ursula5.
tap the “ENTER” button

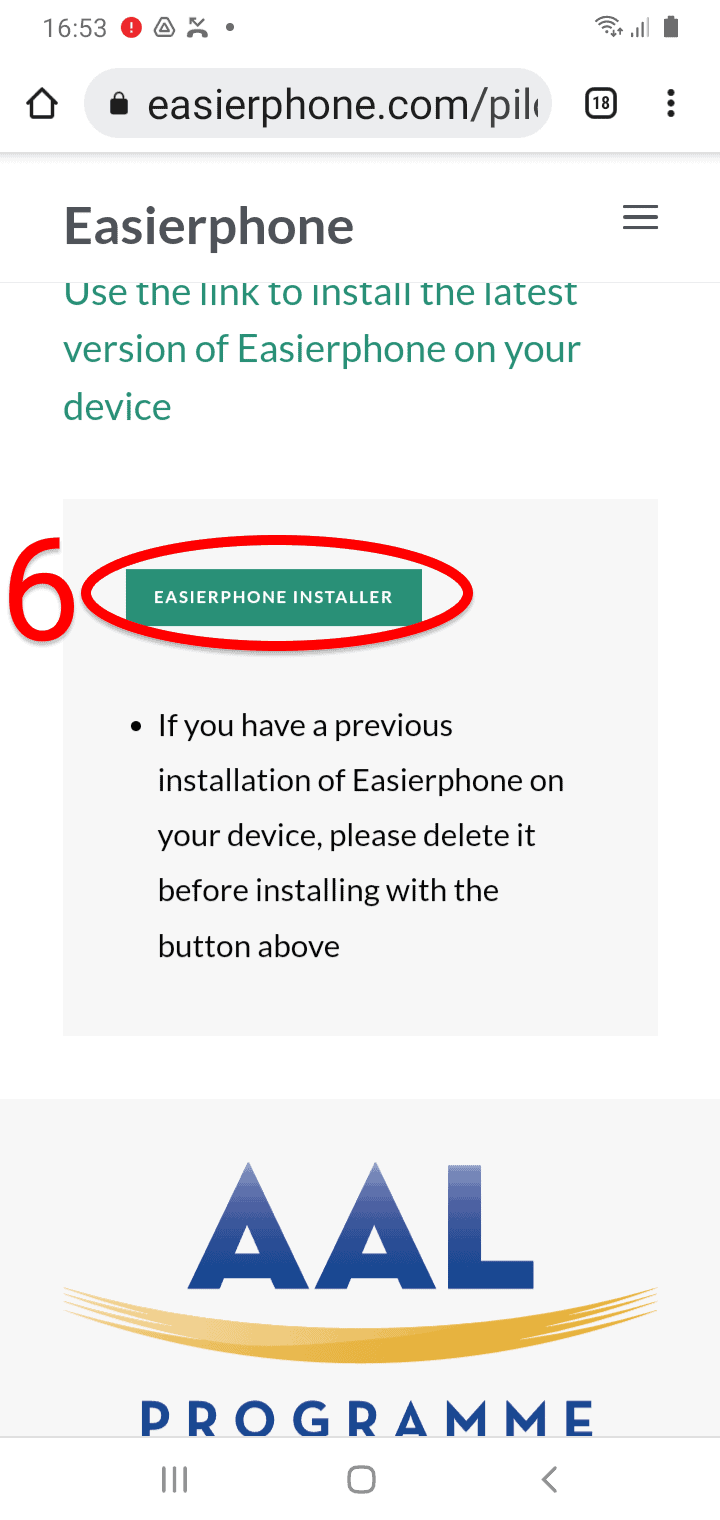
6.
Tap the EASIERPHONE INSTALLER button
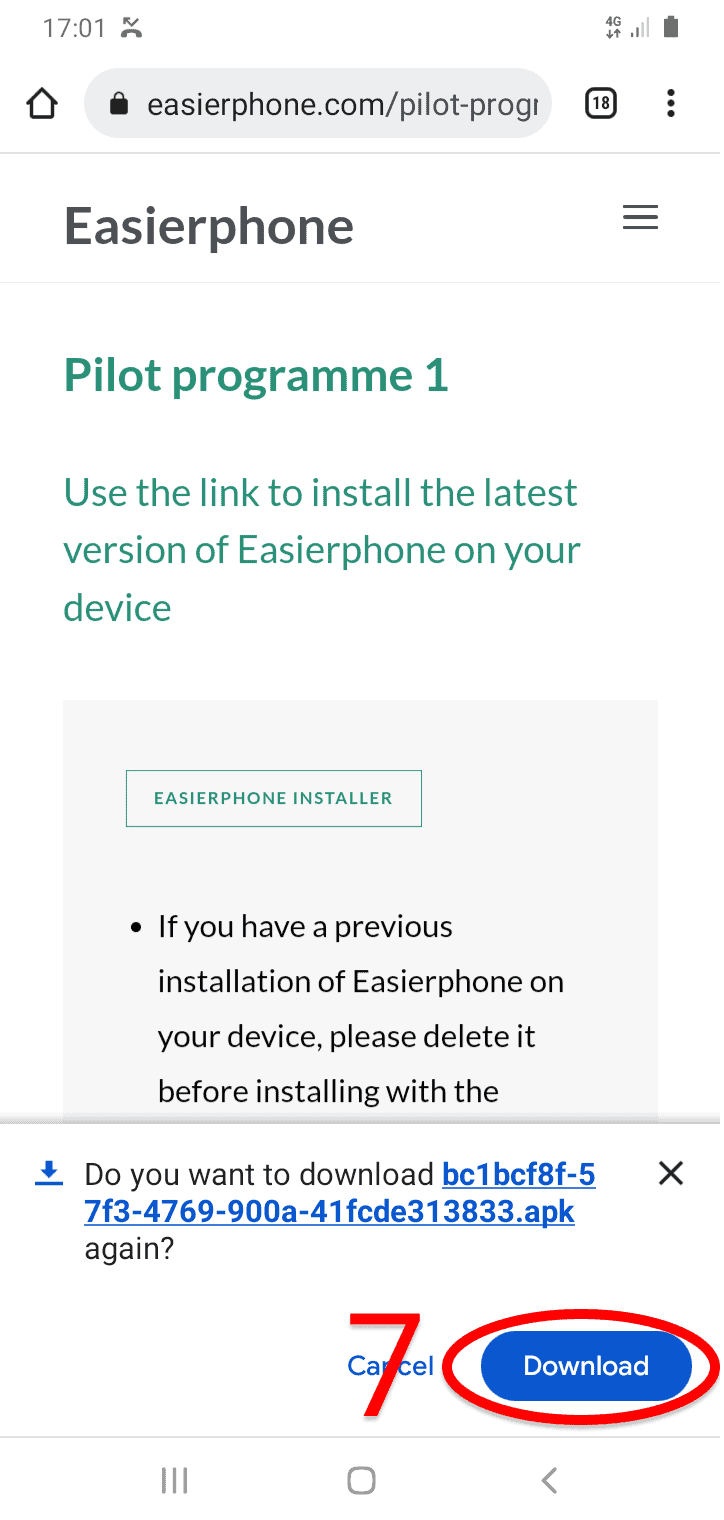
7.
Tap the Download link
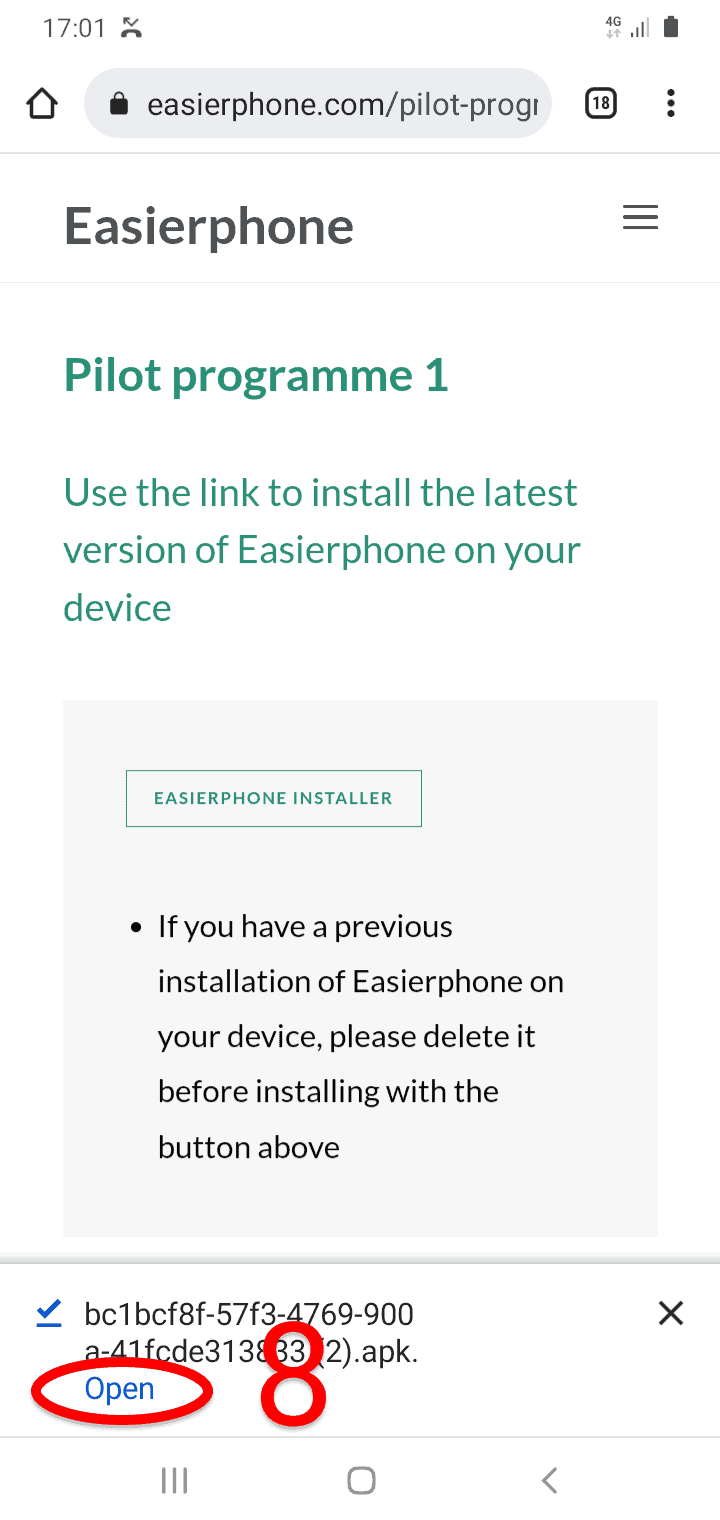
8.
Tap the Open link to open the downloaded installer file
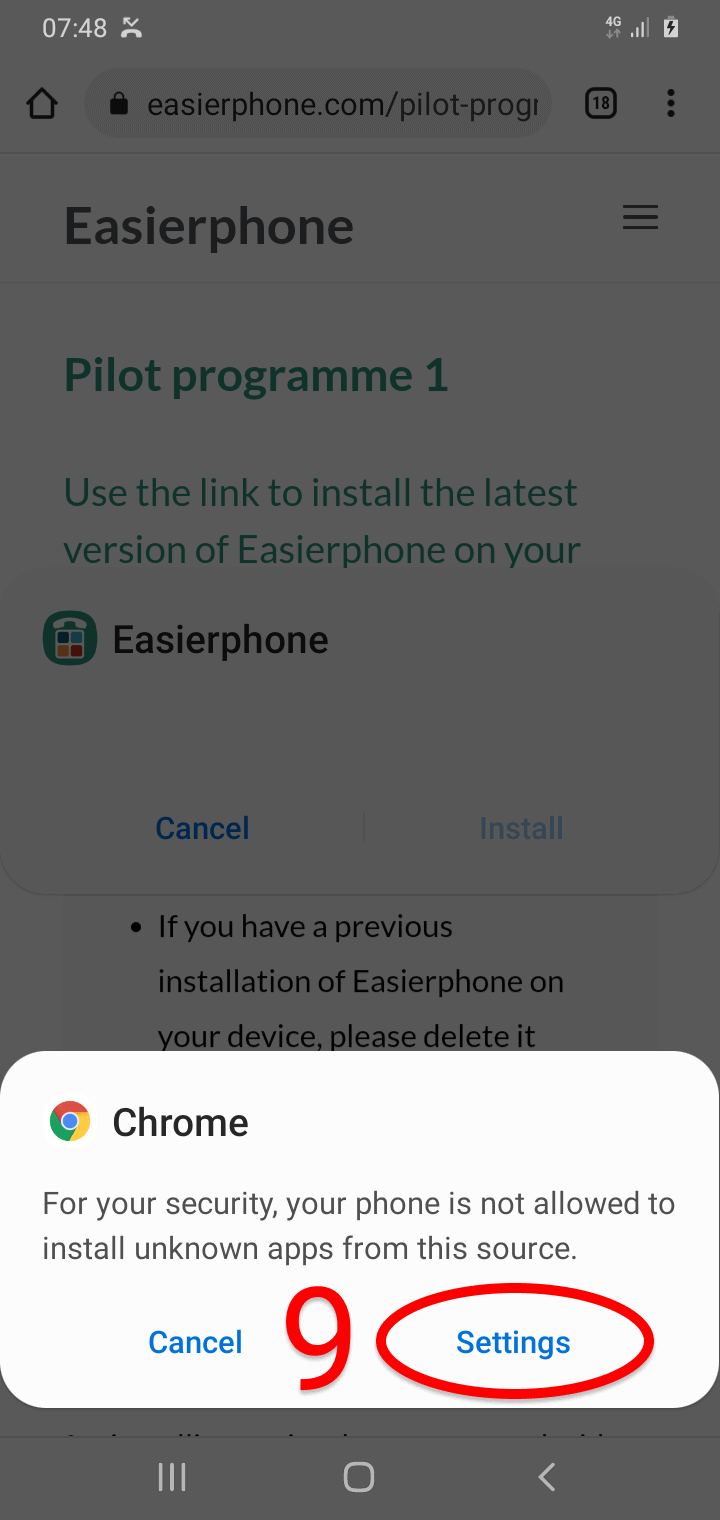
9.
Tap “Settings”
*If you have not previously installled a file from your browser, you will be asked to allow it in the settings
(you might not see this step if you have previously installed files from you browser on your phone; in this case, proceed directly to step 12)
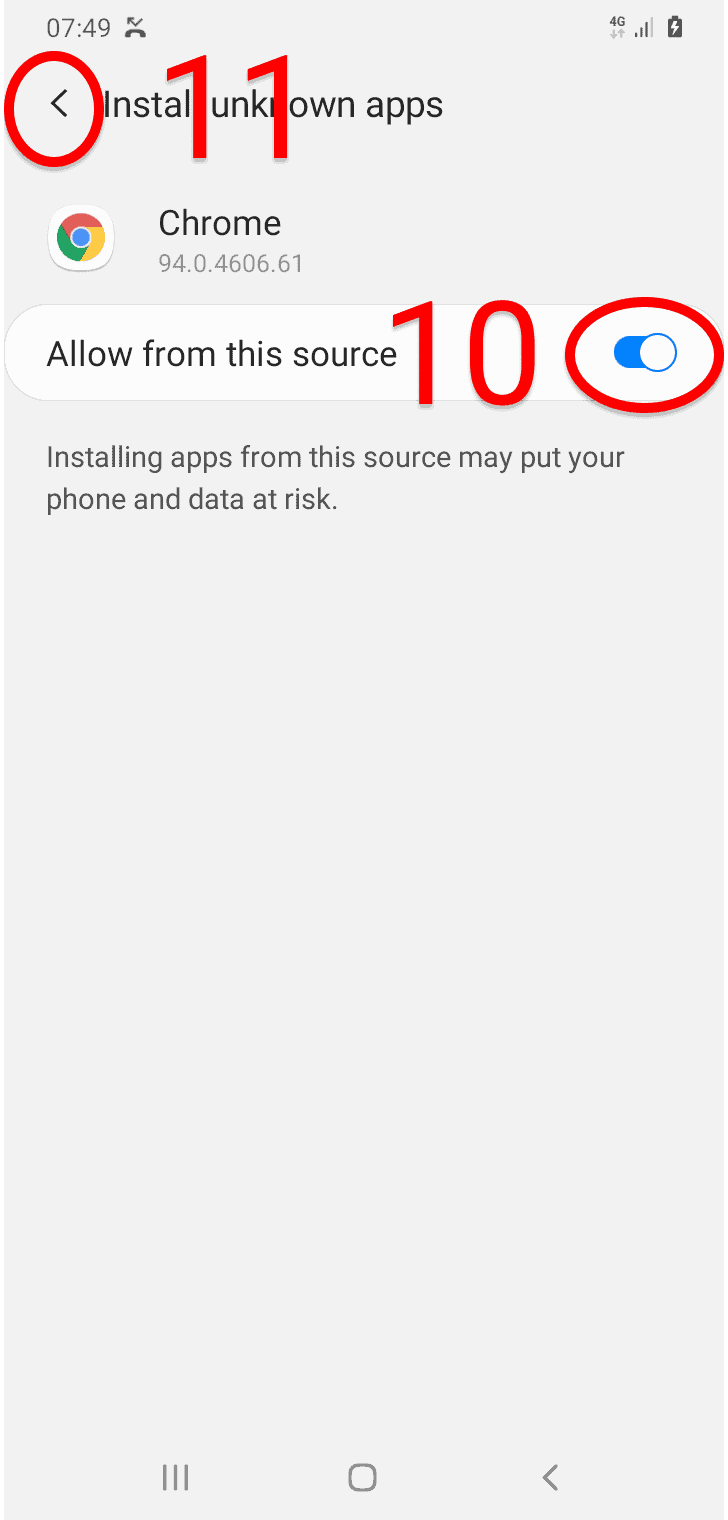
10.
Toggle the switch “Allow from this source”
11.
Tap the back arrow
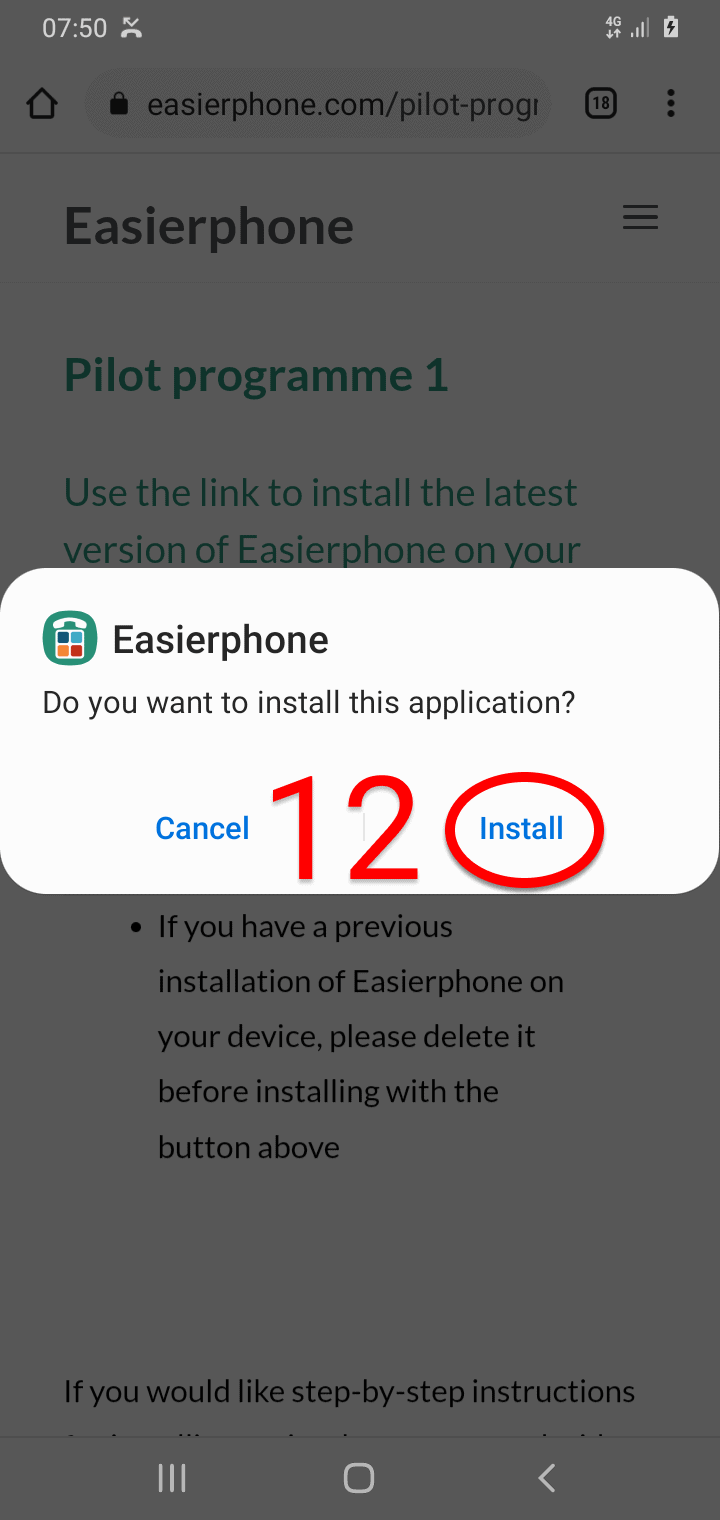
12.
Tap Install to install the Easierphone app on the device
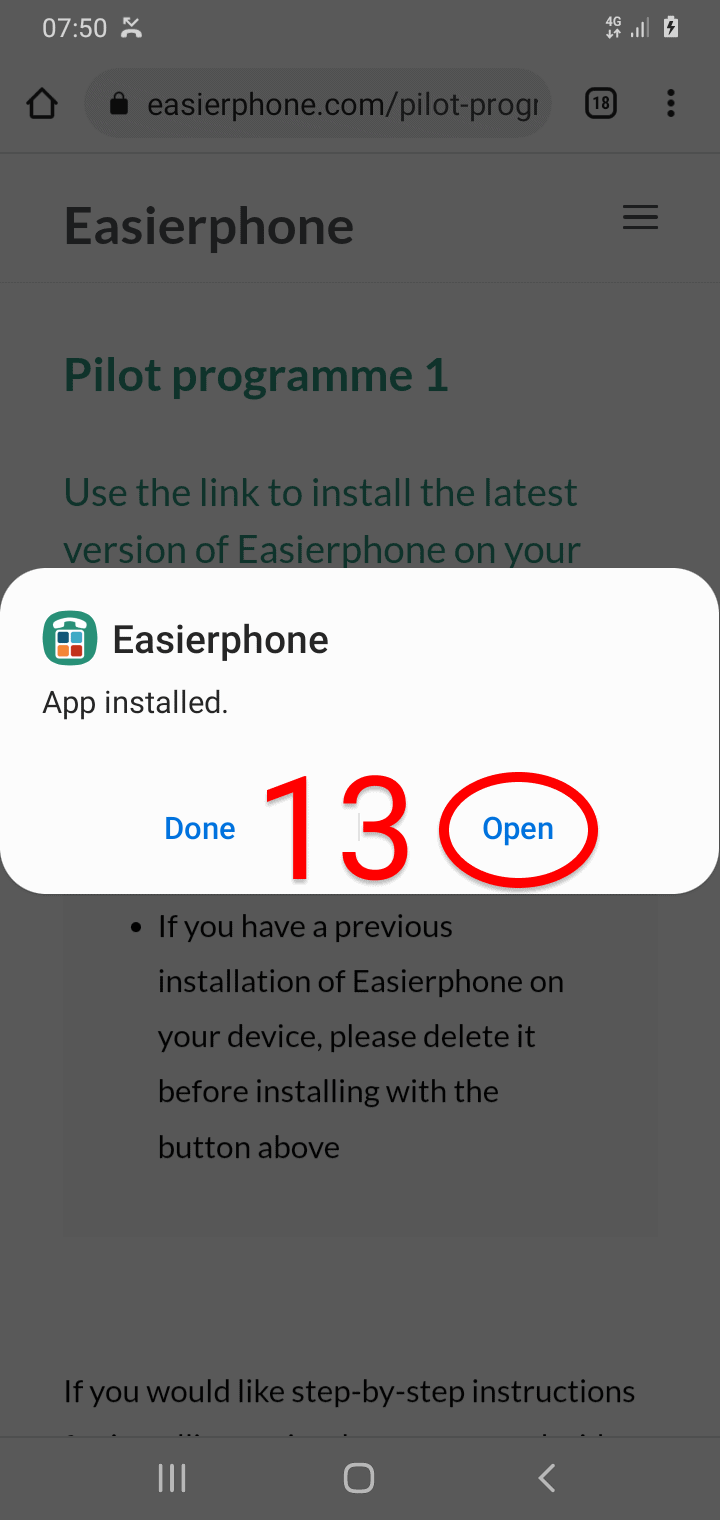
13.
Tap Open to open the installed Easierphone app
Ustawianie uprawnień
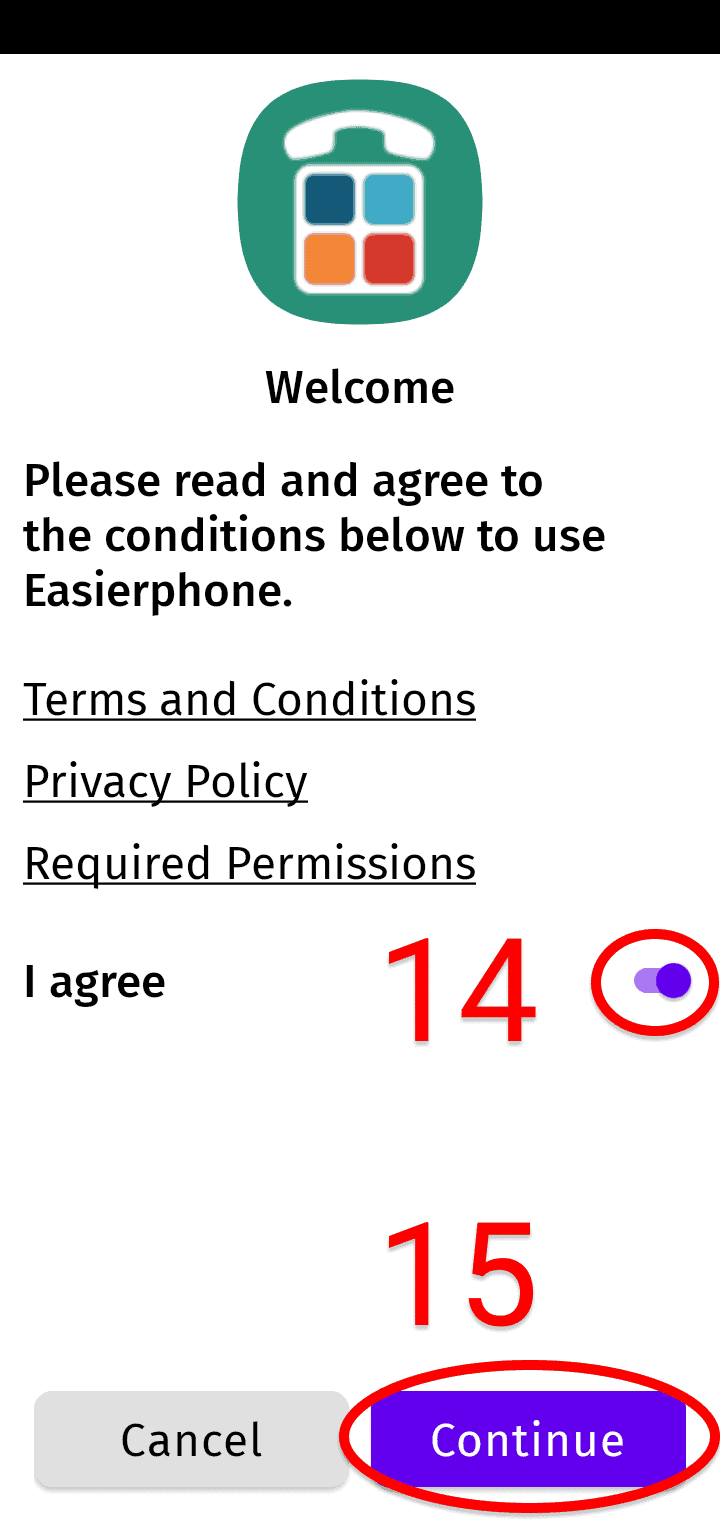
14.
Toggle the switch I agree15.
Tap Continue
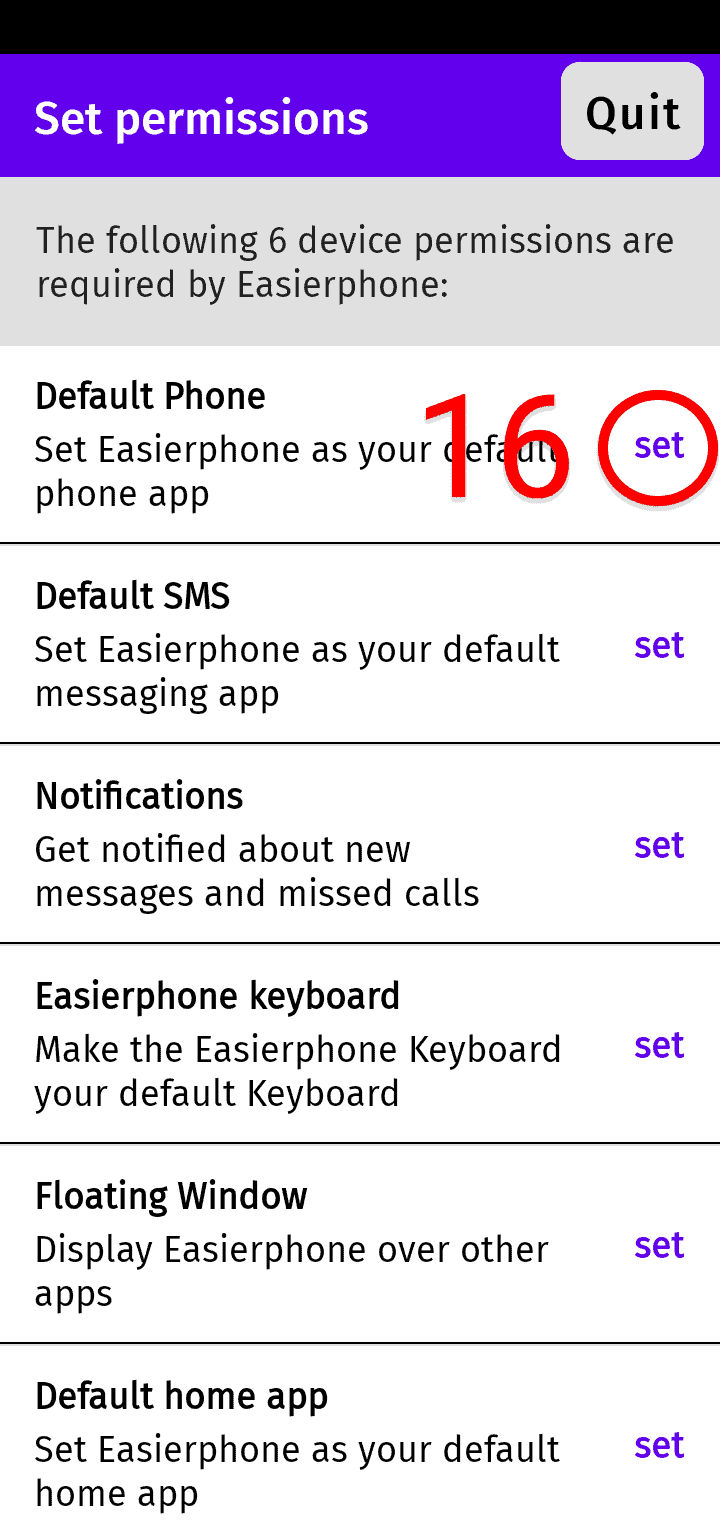
16.
Tap set for Default Phone
17.
Select the radio button for Easierphone

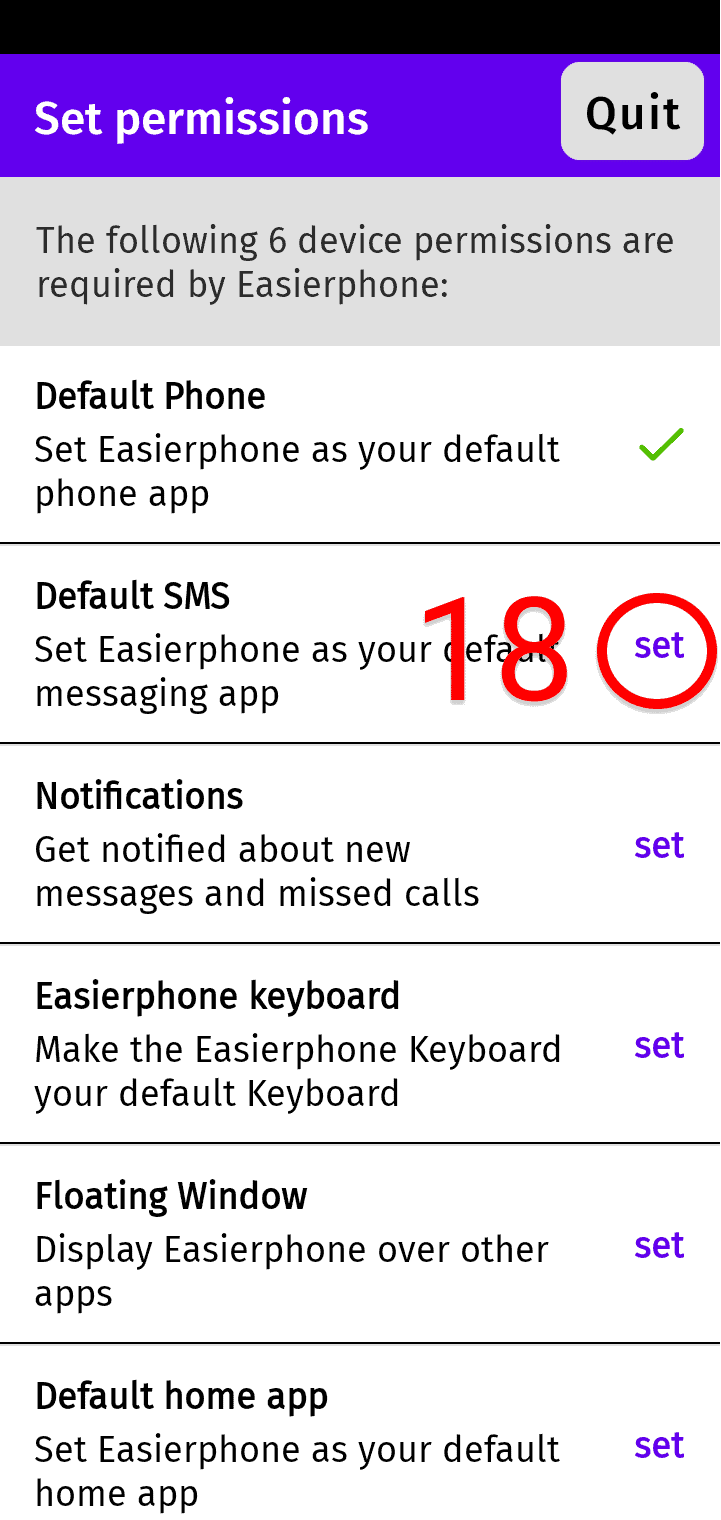
18.
Tap set to set Default SMS
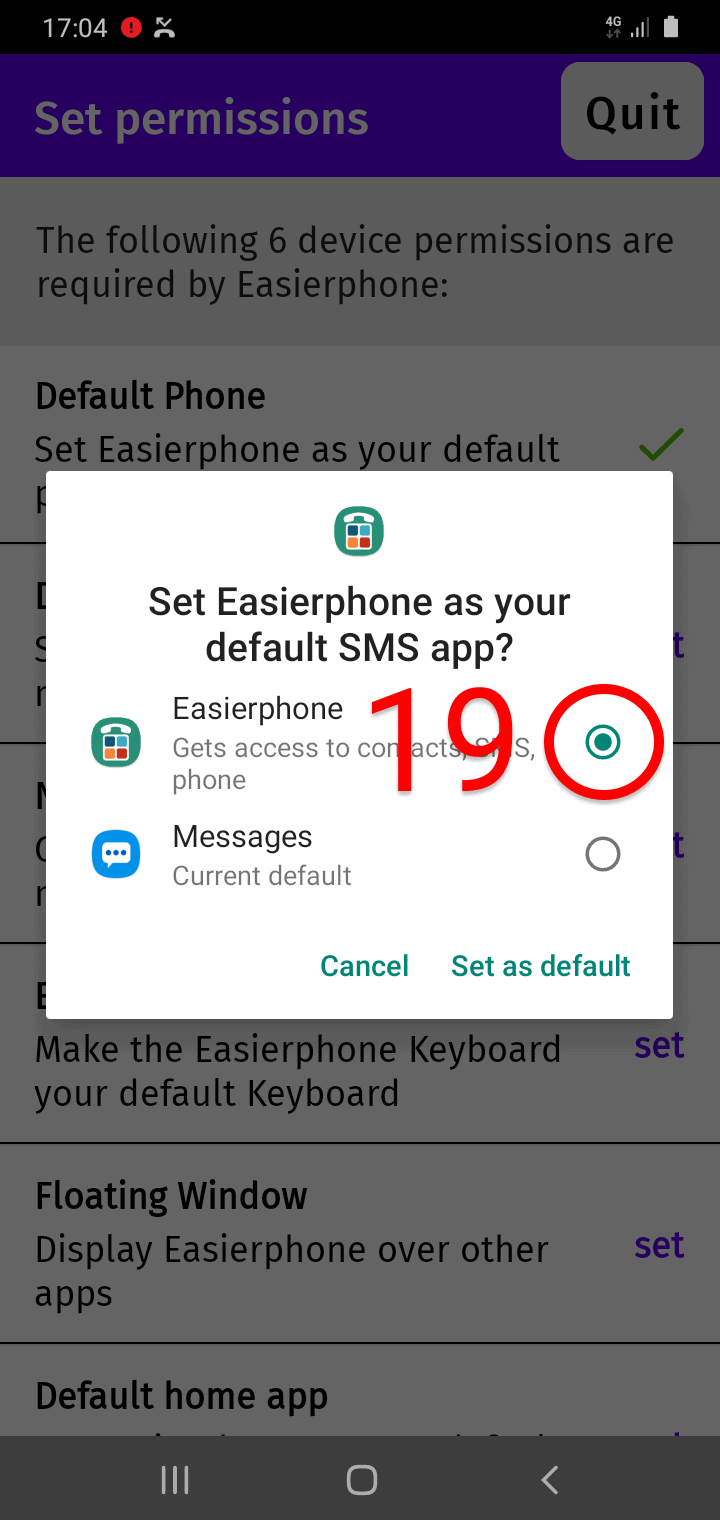
19.
Select the radio button for Easierphone
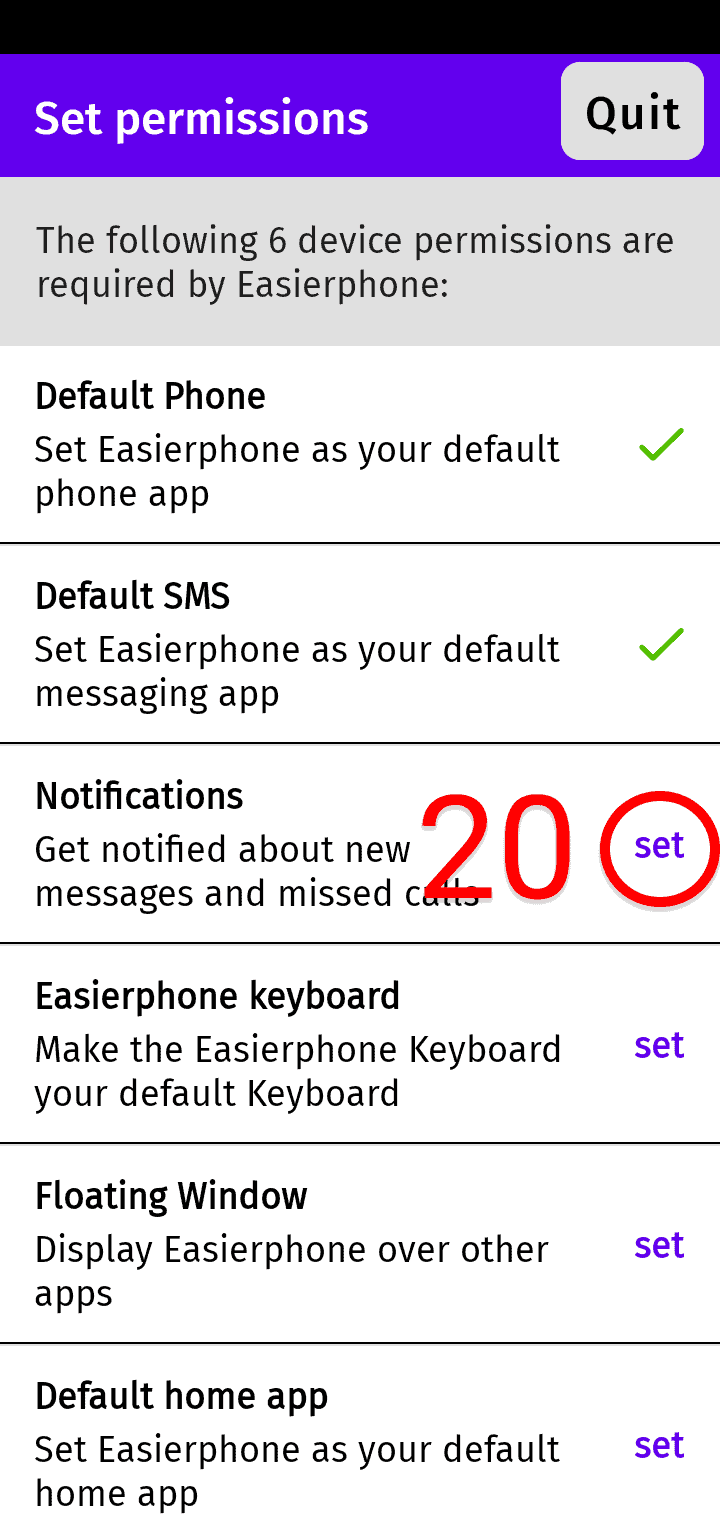
20.
Tap set to set the notification permission
21.
Toggle the swich next to Easierphone
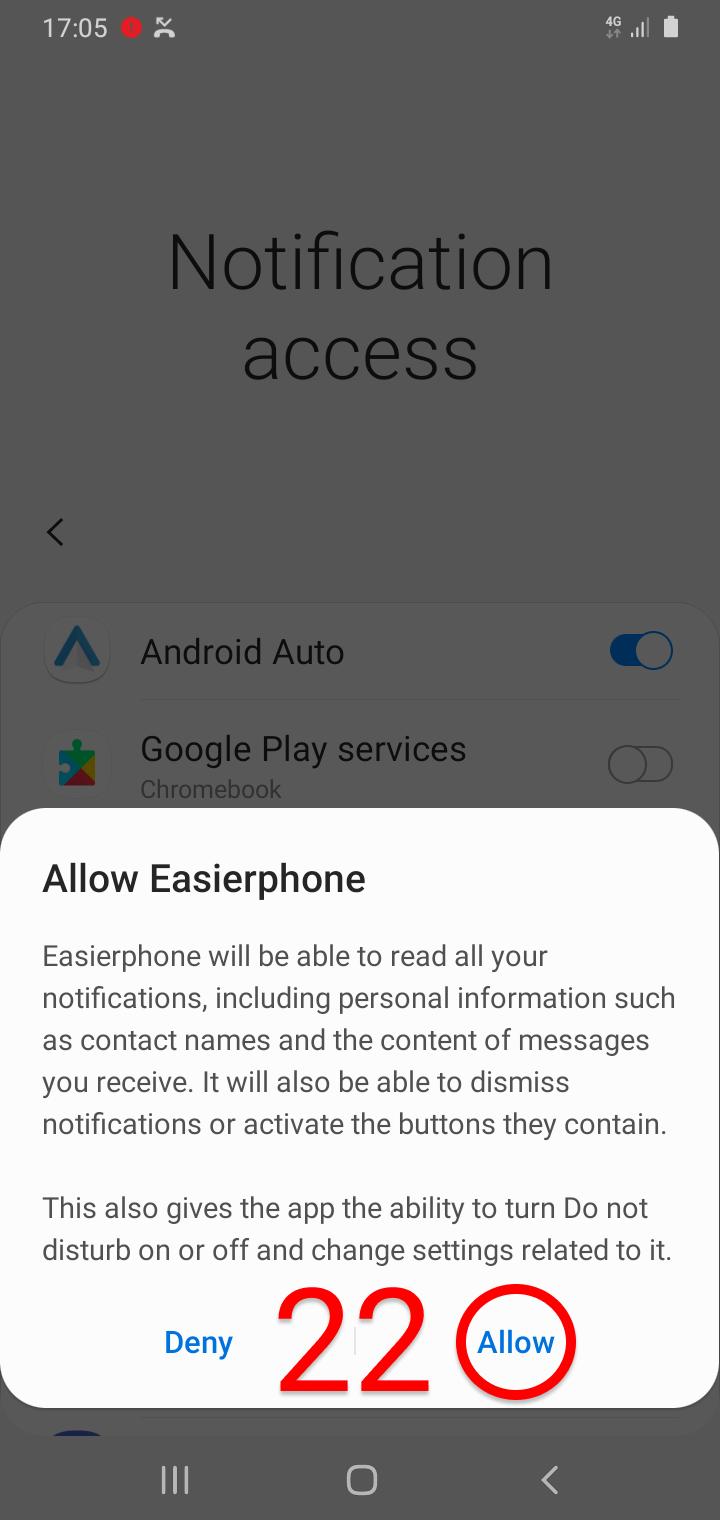
22.
In the following pop-up, Tap allow

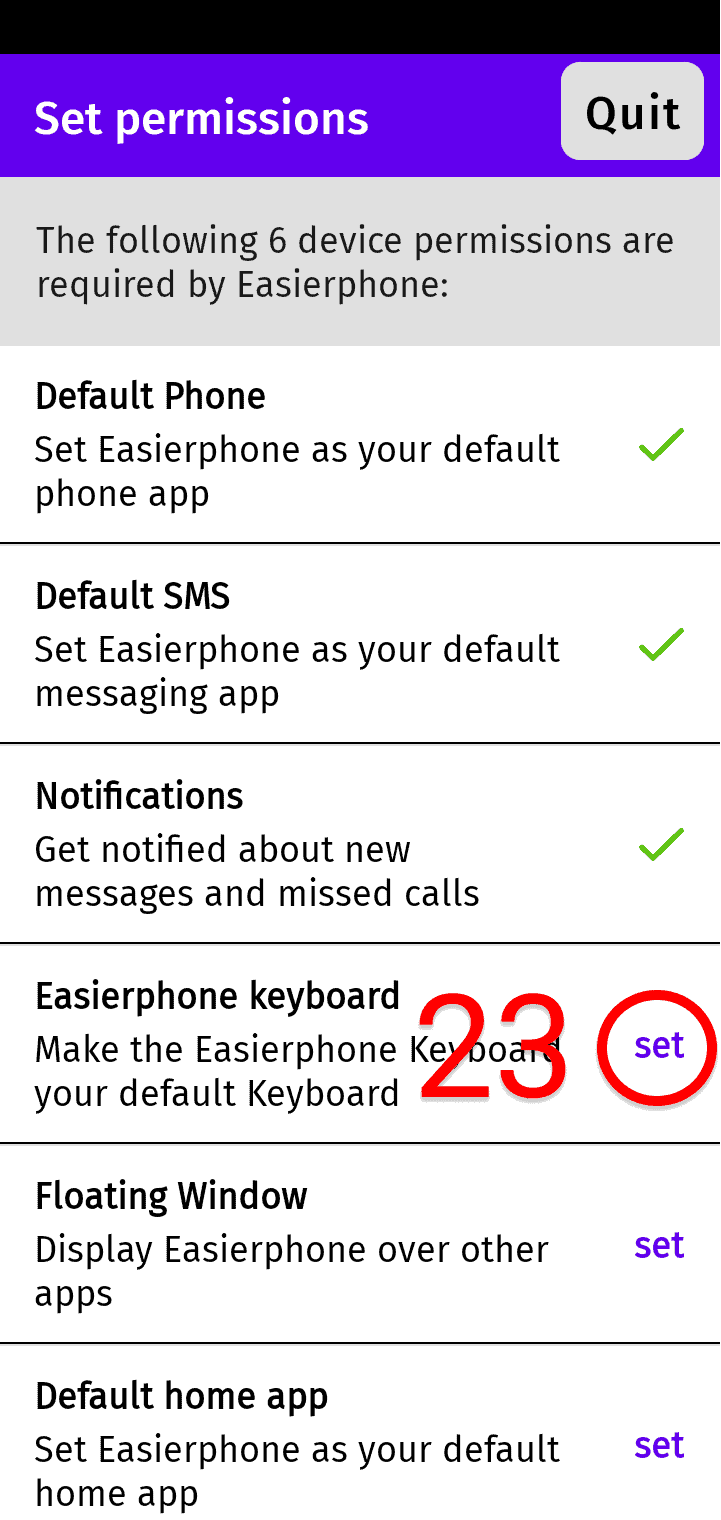
23.
Tap set to enable the Easierphone keyboard
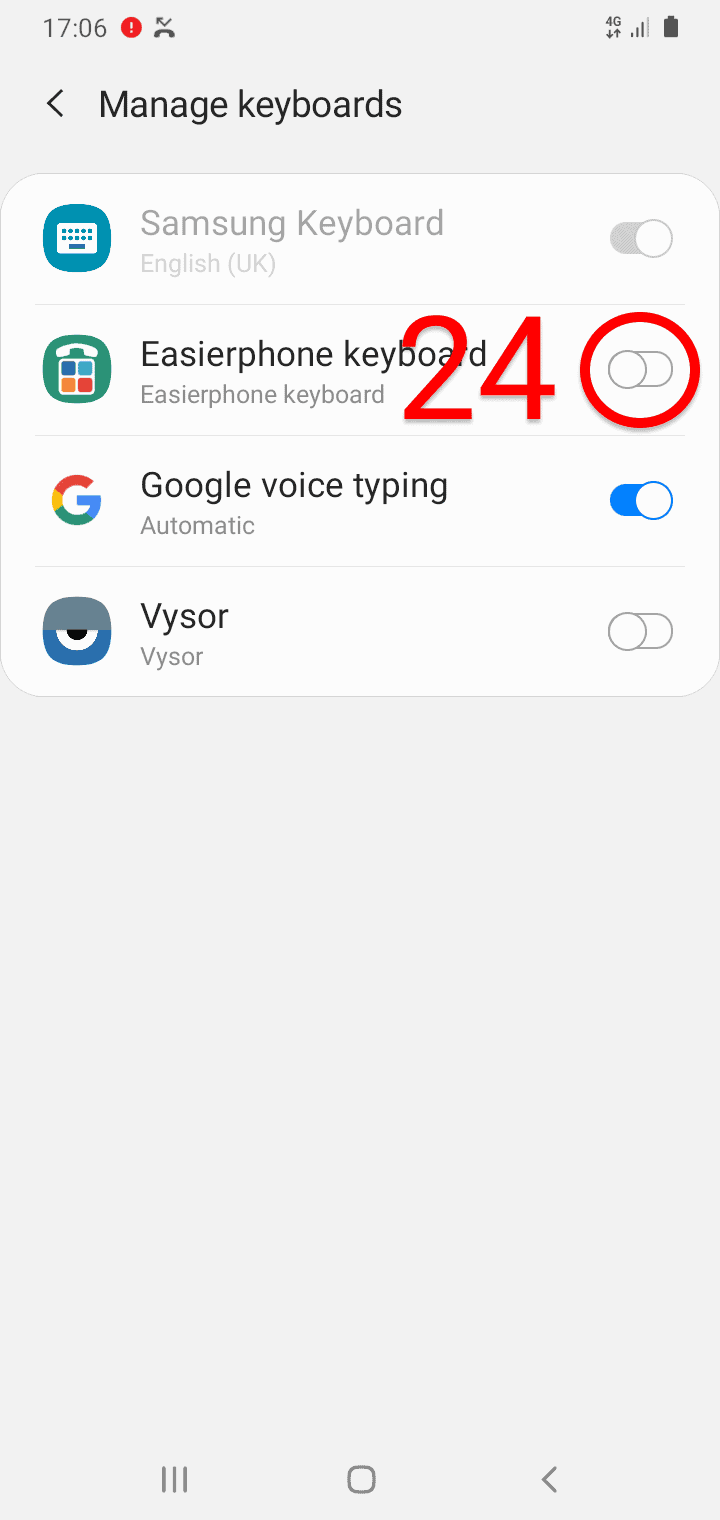
24.
Toggle the switch neyt to Easierphone keyboard
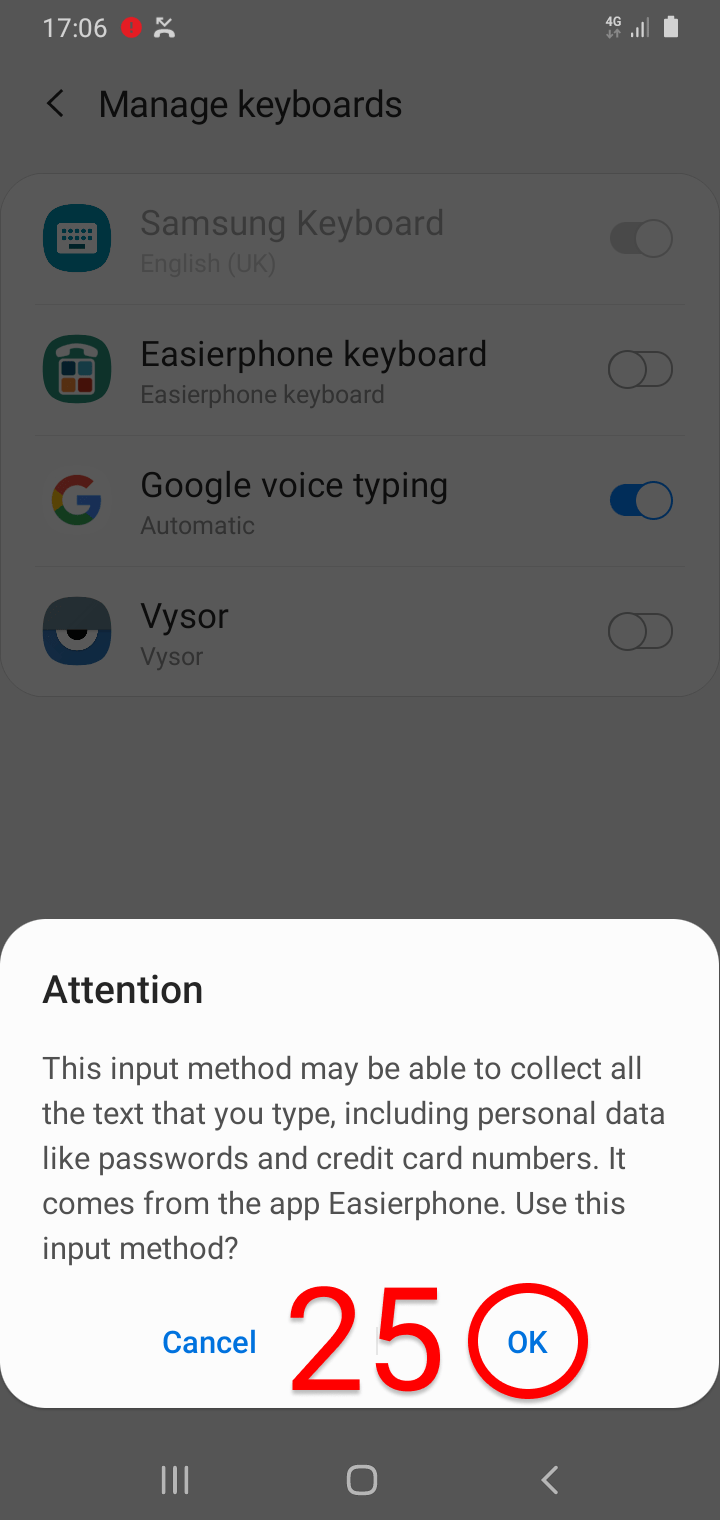
25.
Tap OK *
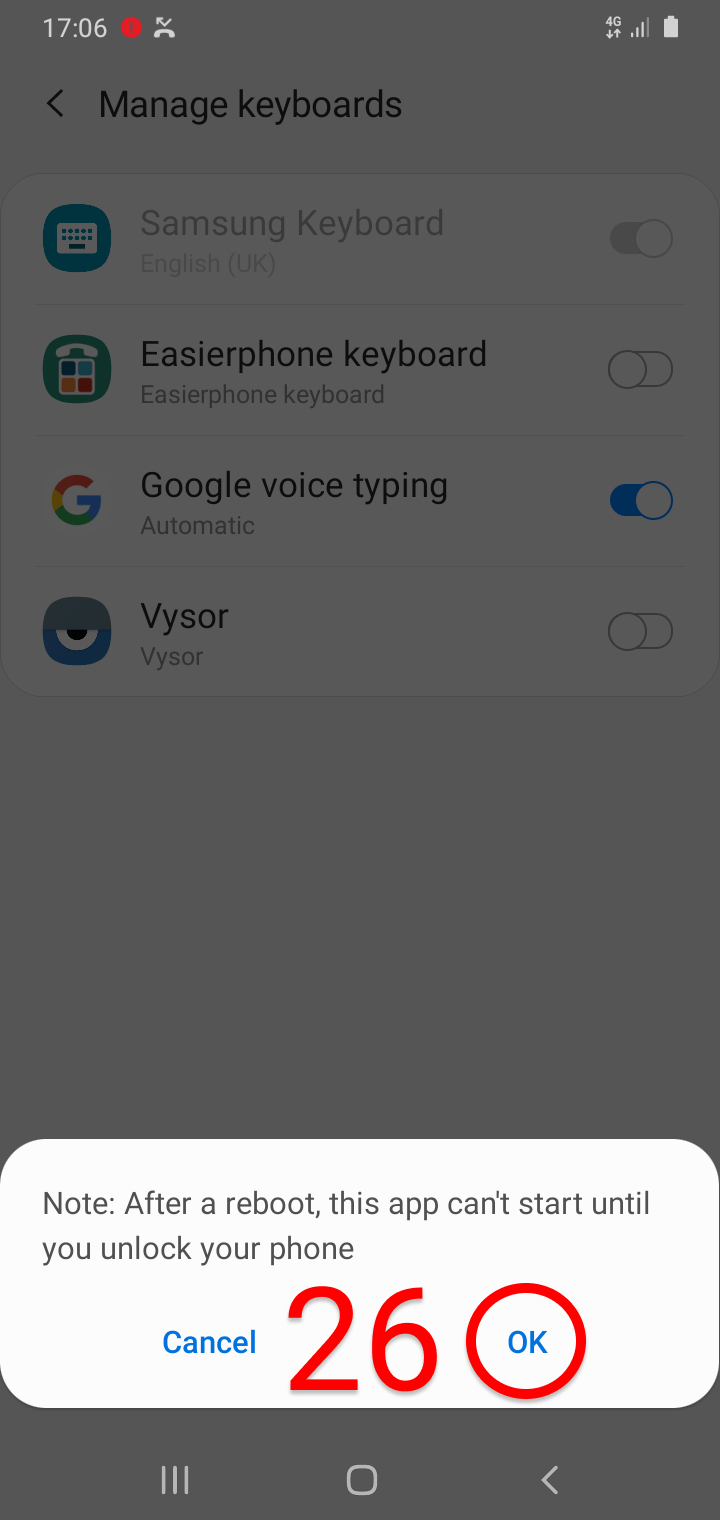
26.
Tap OK
*This is a system warning. Easierphone does NOT collect any data you type.
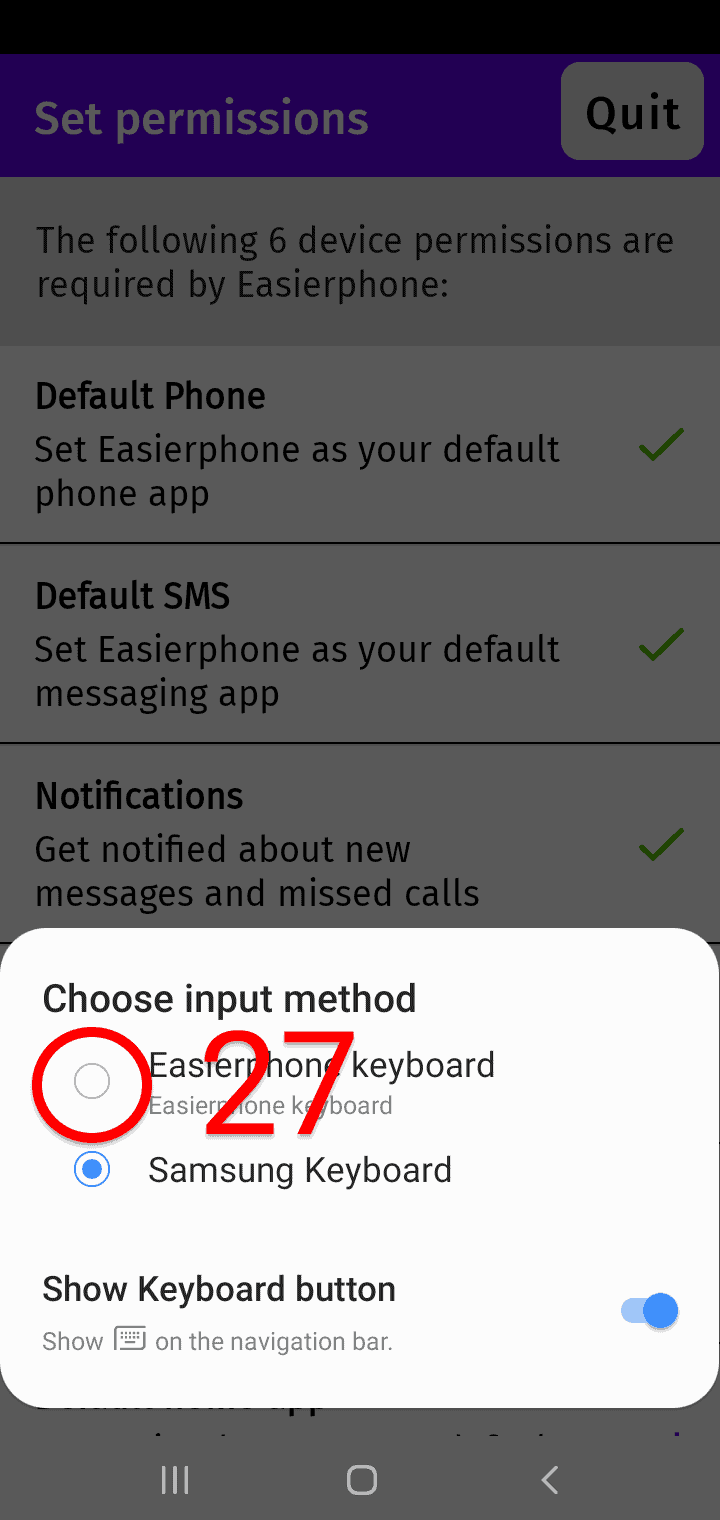
27.
Choose the radio button next to Easierphone keyboard
28.
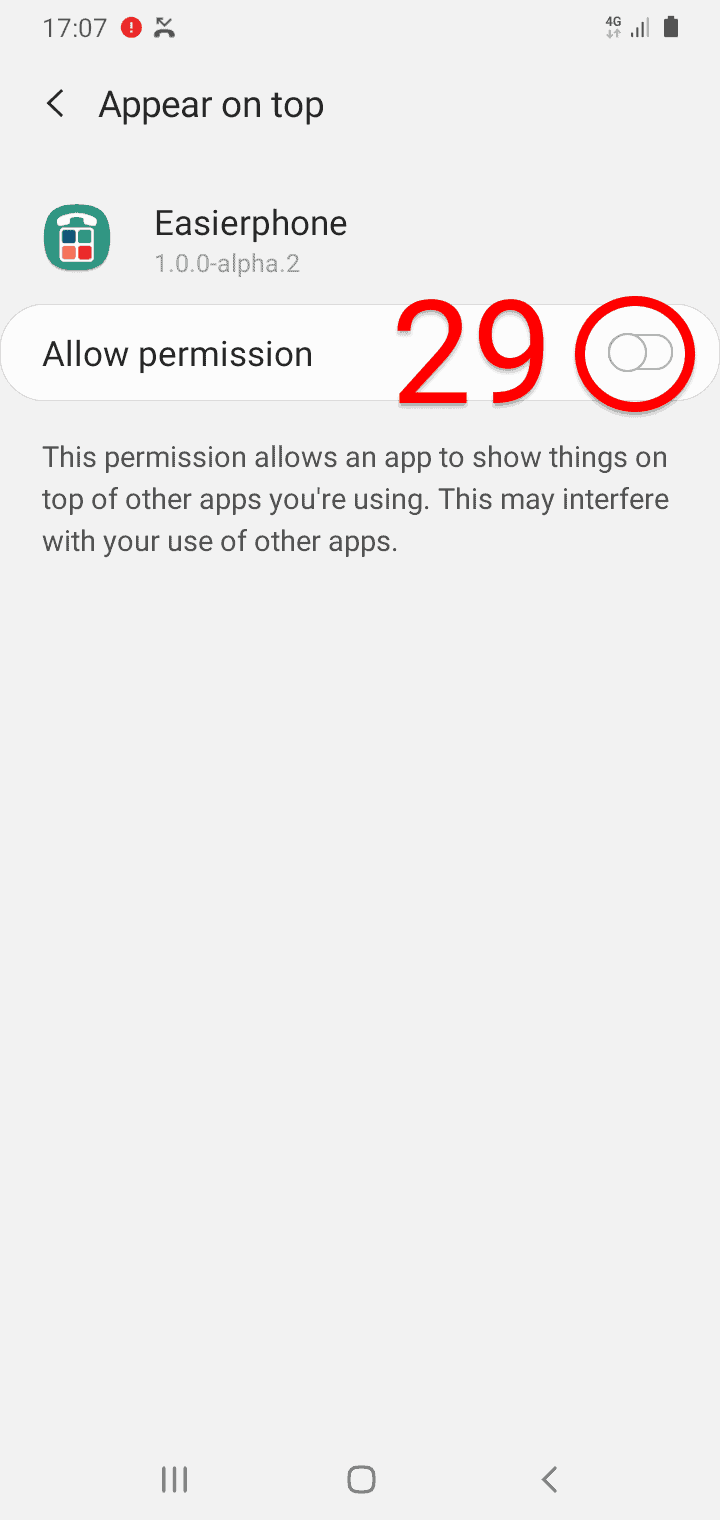
Tap set to display floating windows
29.
Toggle the switch on Allow permission

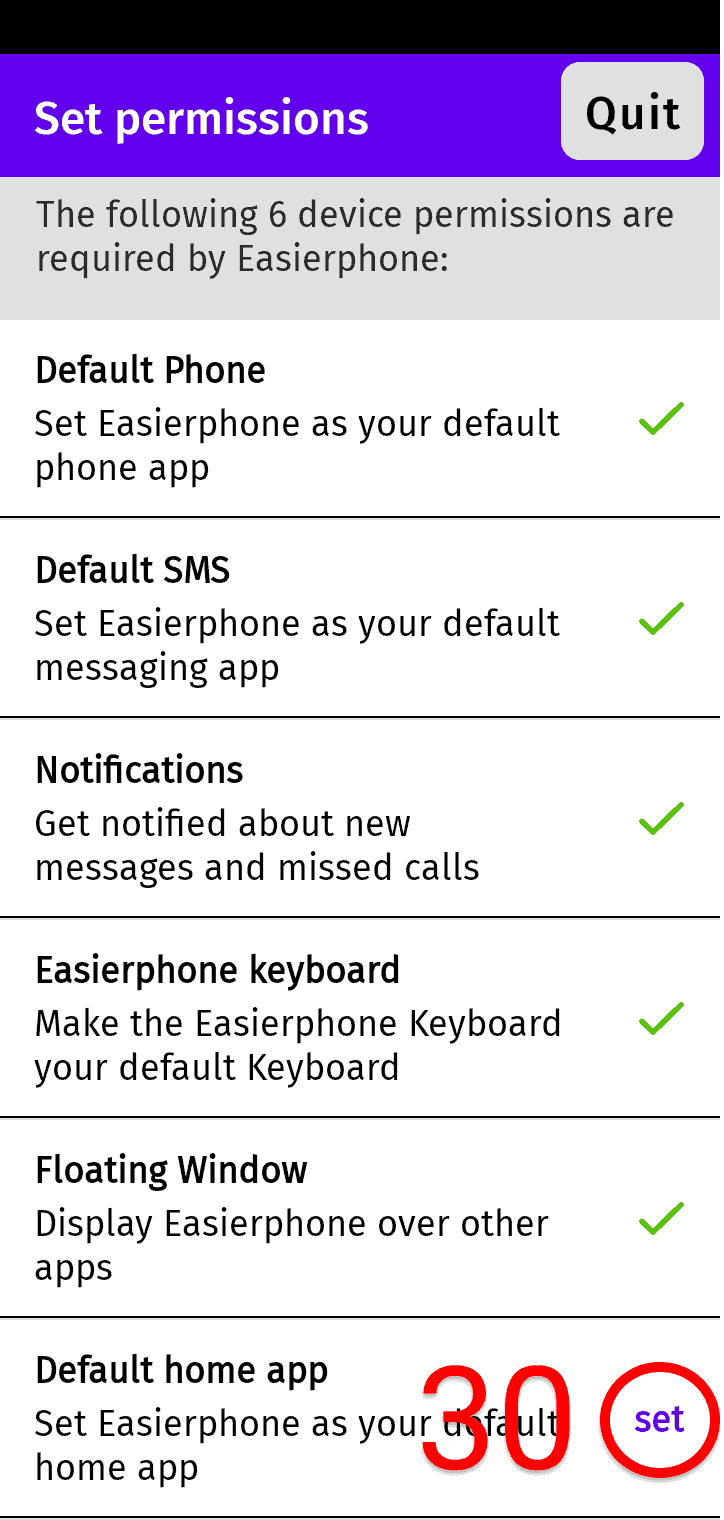
30.
Tap set to set Easierphone as the default home app
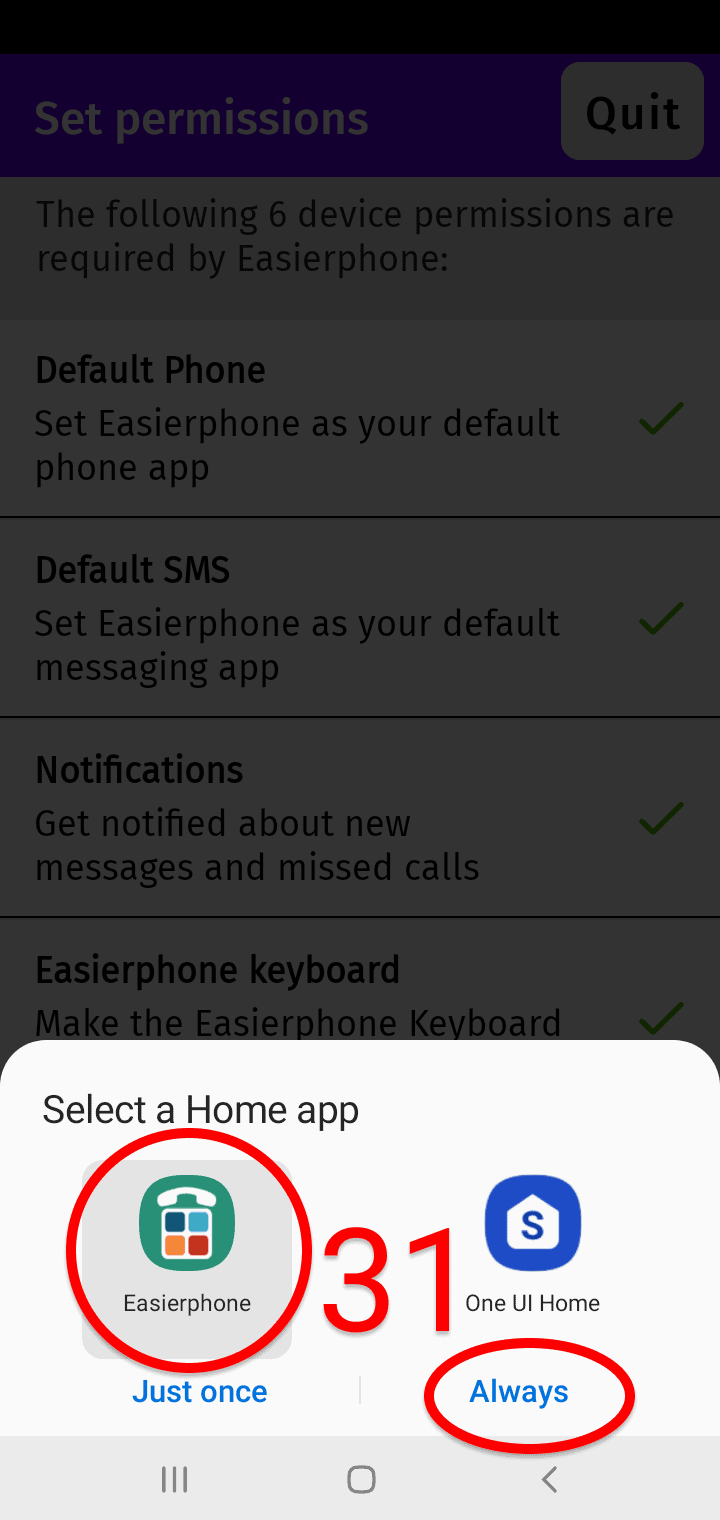
31.
tap the easierphone icon and Always
32.
Tap Done
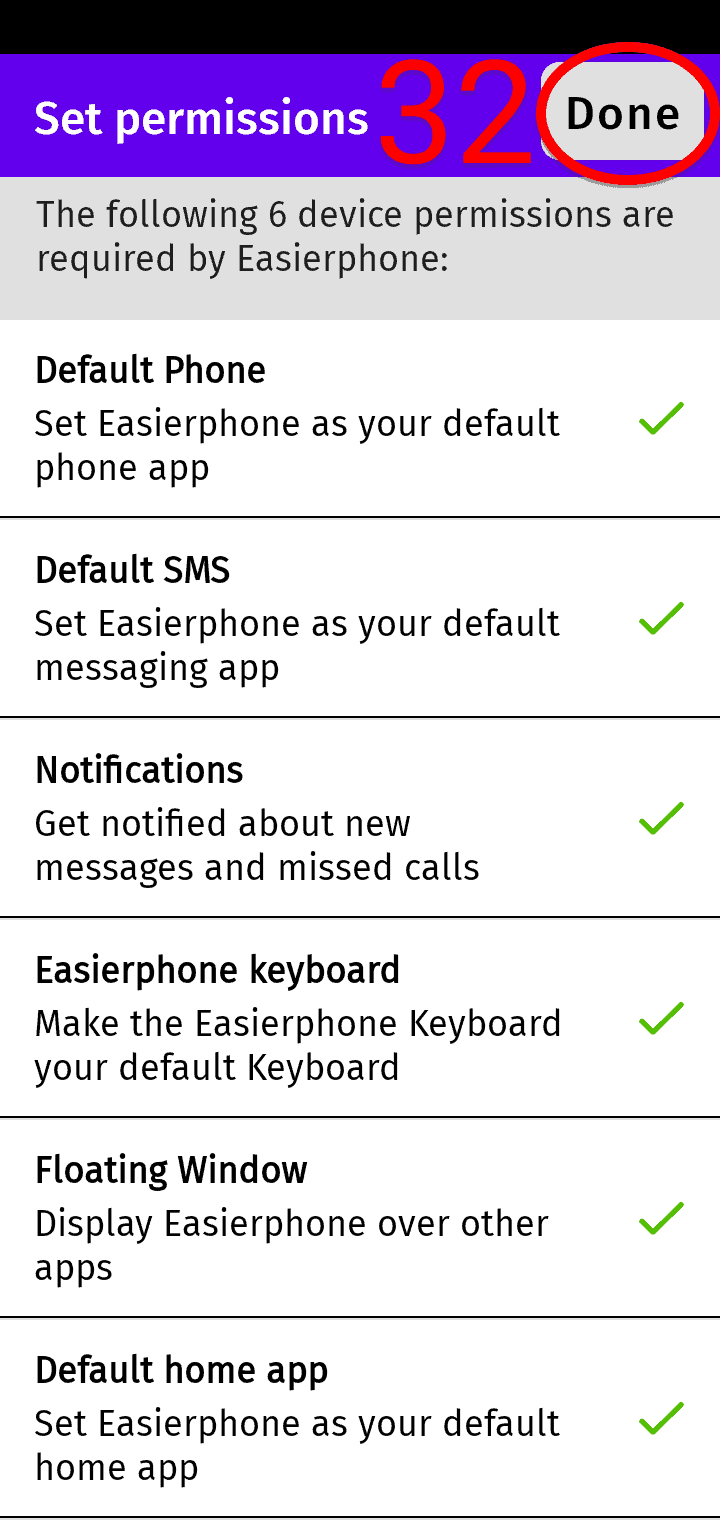
Gotowe – masz teraz ustawione wszystkie niezbędne uprawnienia. Uprawnienia można zawsze zmienić ponownie, przechodząc do ustawień easierphone / uprawnienia.
Konfiguracja użytkownika
Tutaj upewnisz się, że wszystkie istniejące adresy i wiadomości są importowane do easierphone, a także skonfigurujesz przycisk alarmowy.
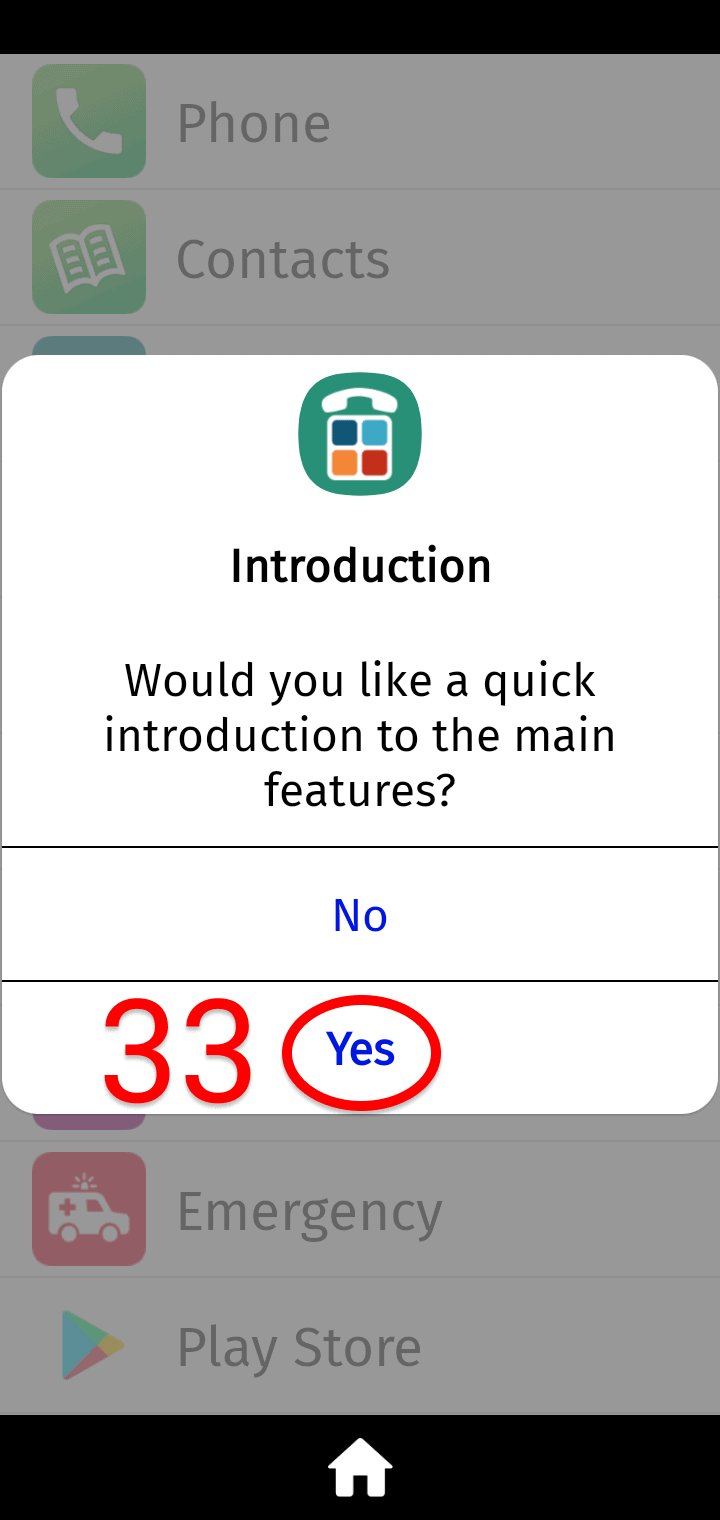
33.
Tap Yes34.
Tap Next
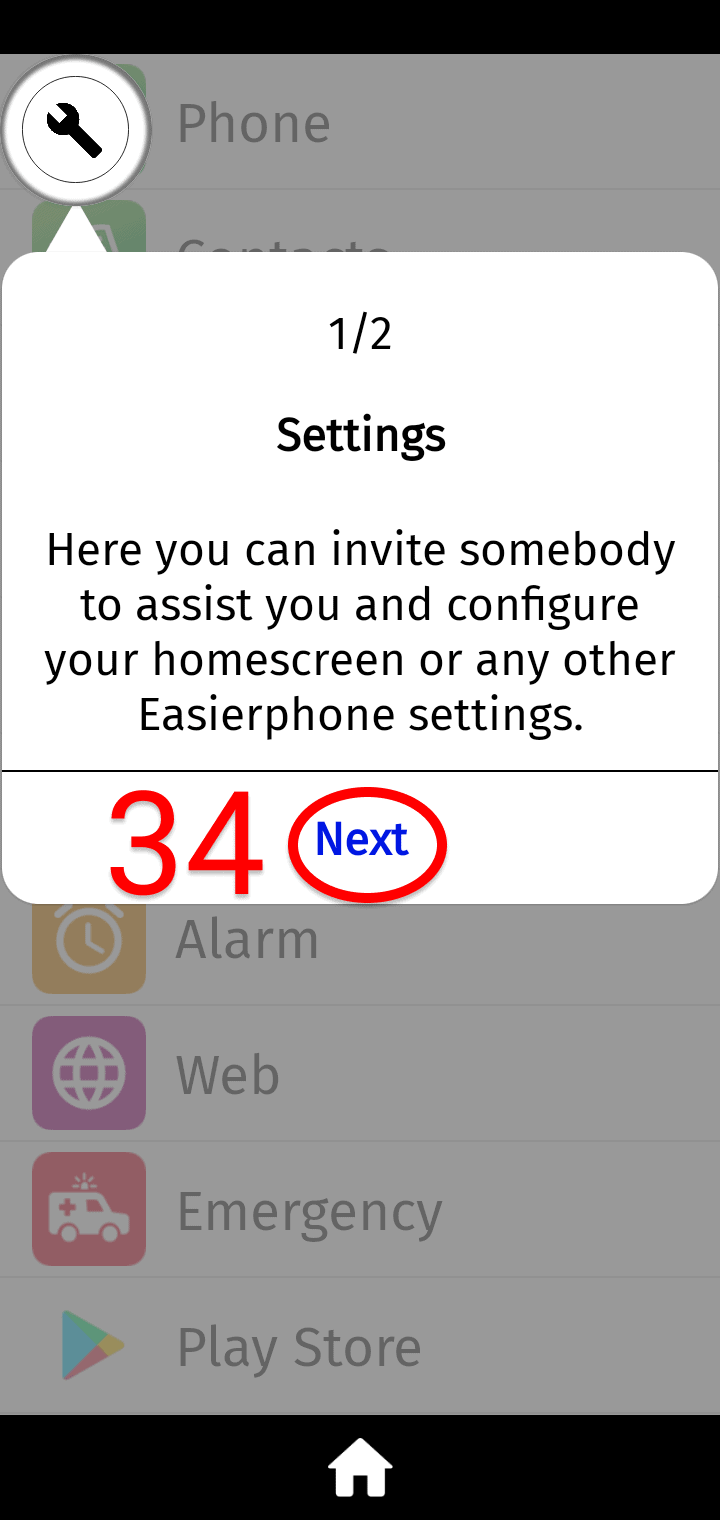
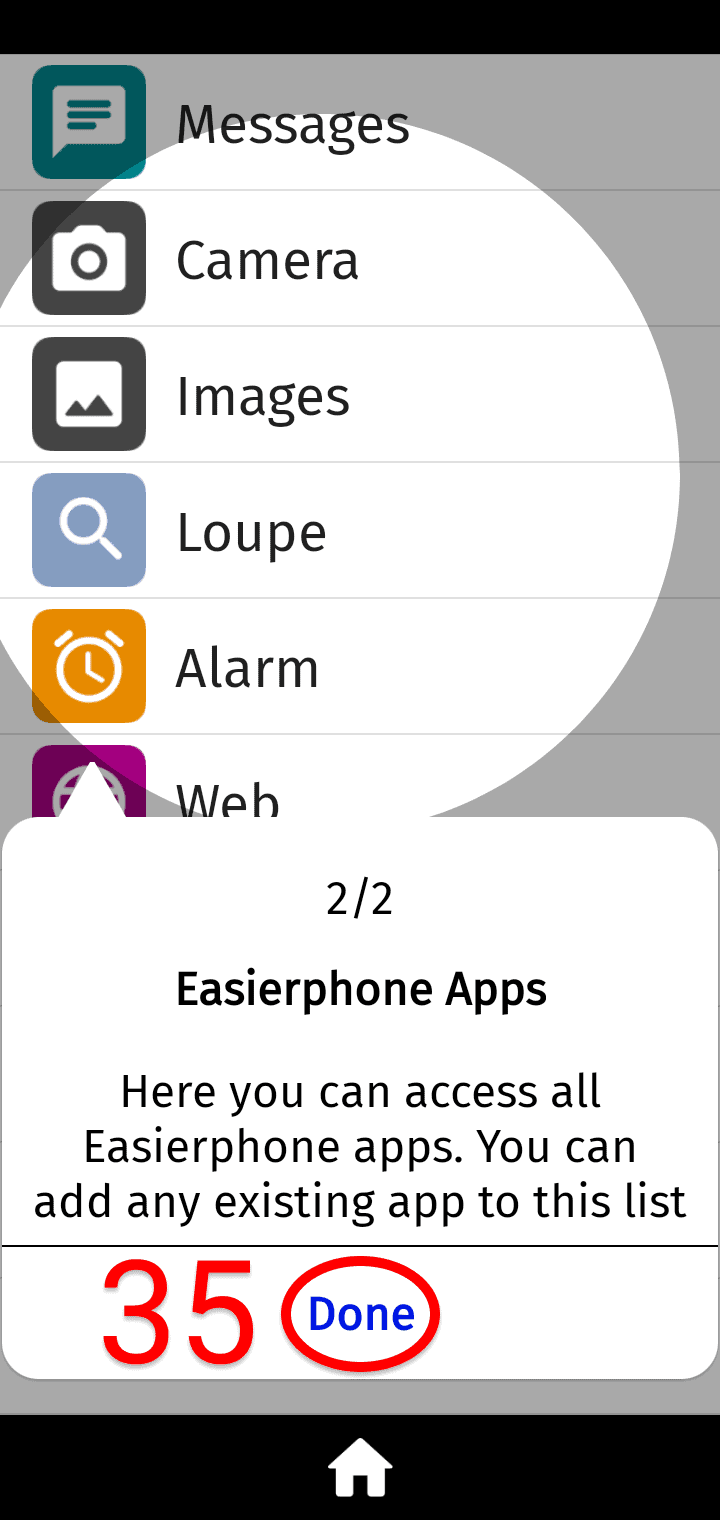
35.
Tap Done
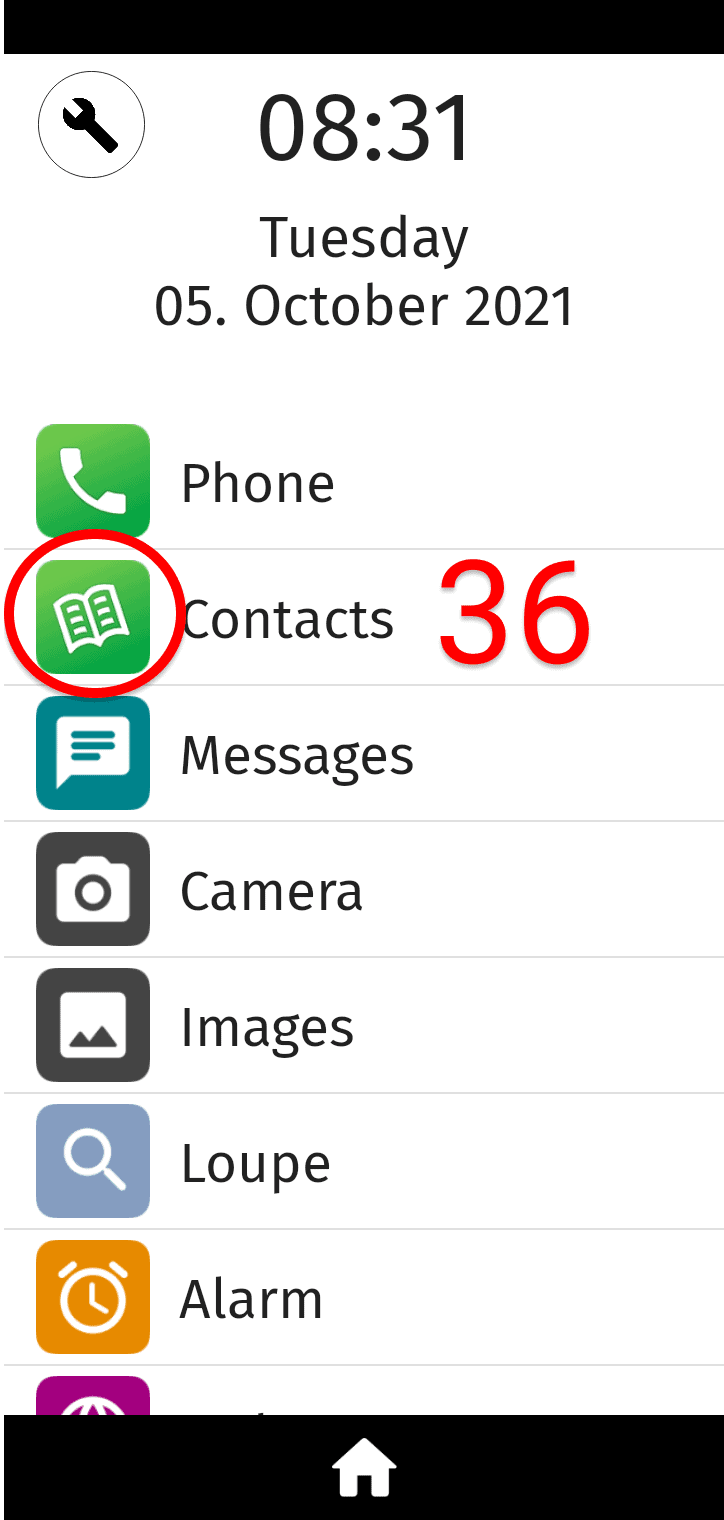
36.
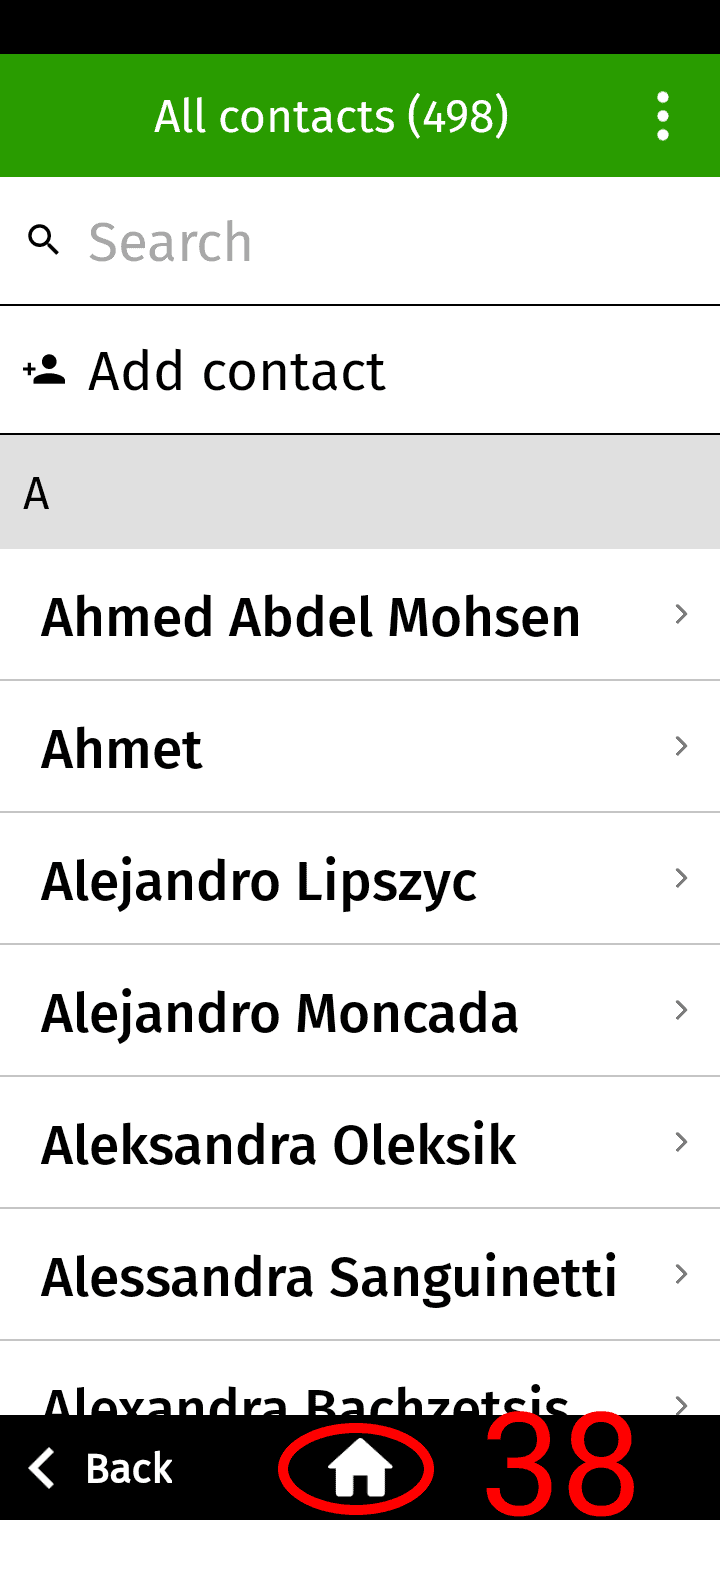
Tap on the Contacts icon
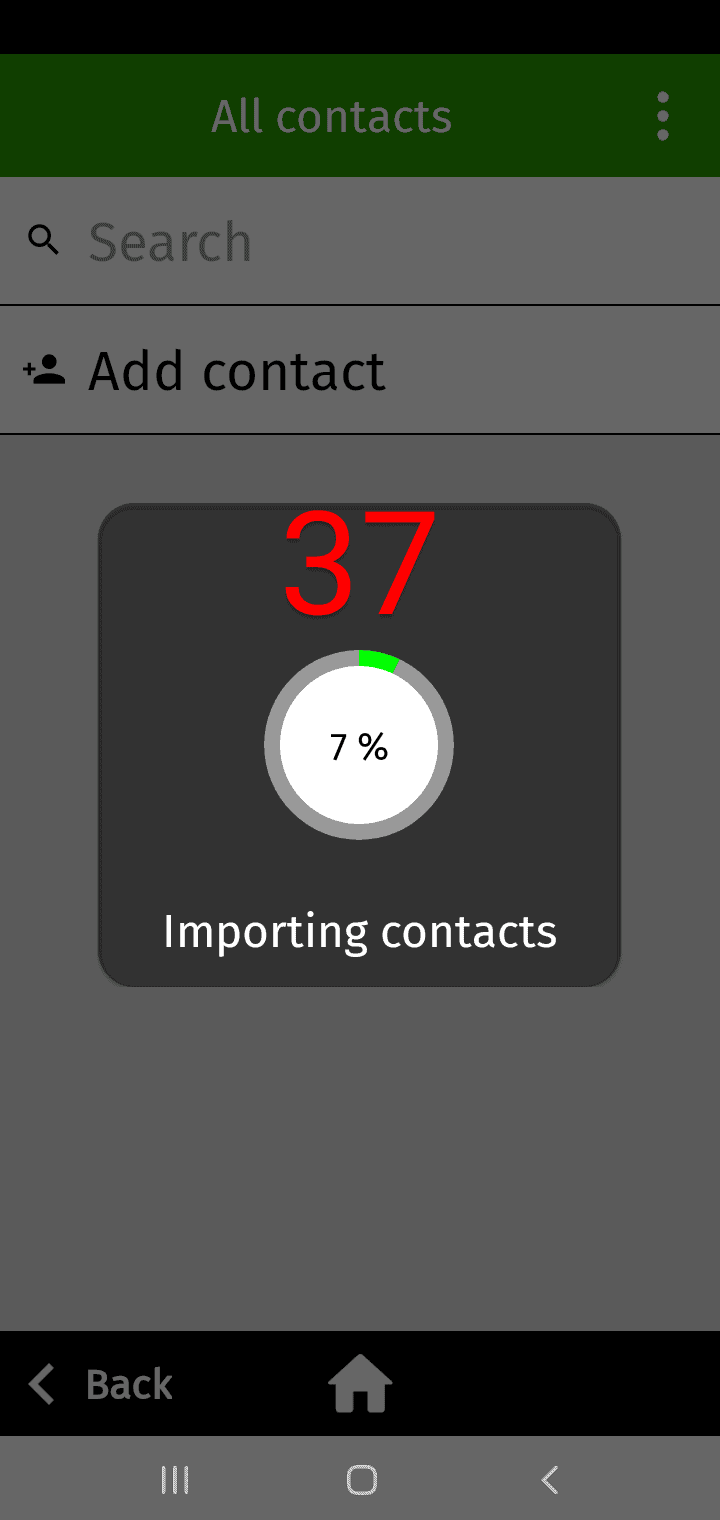
37.
If there are contacts on the phone, they will be imported now. Allow a couple of minutes for the import.
38.
After the import is complete, use the home button to return to the home screen
39.
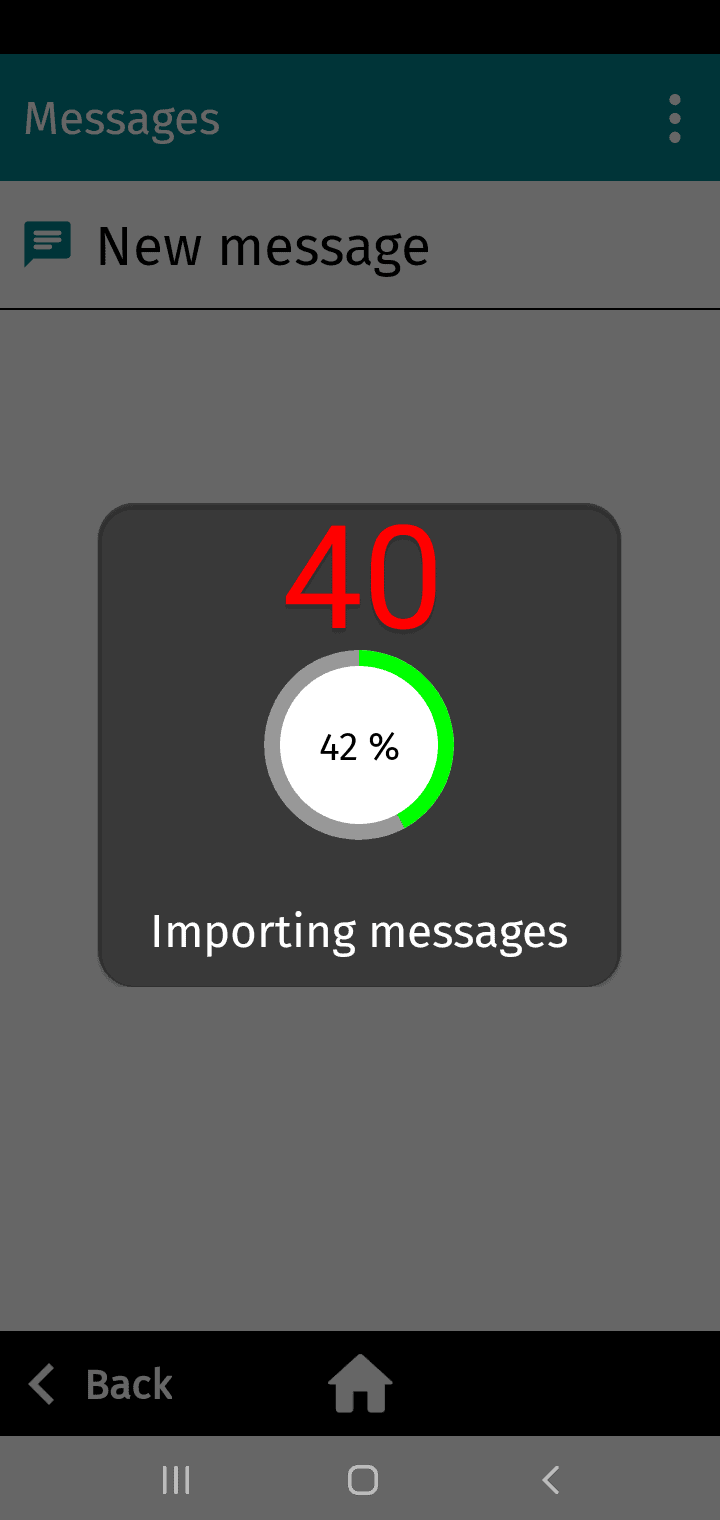
Tap on Messages40.
If the device already contains messages, those messages will be imported

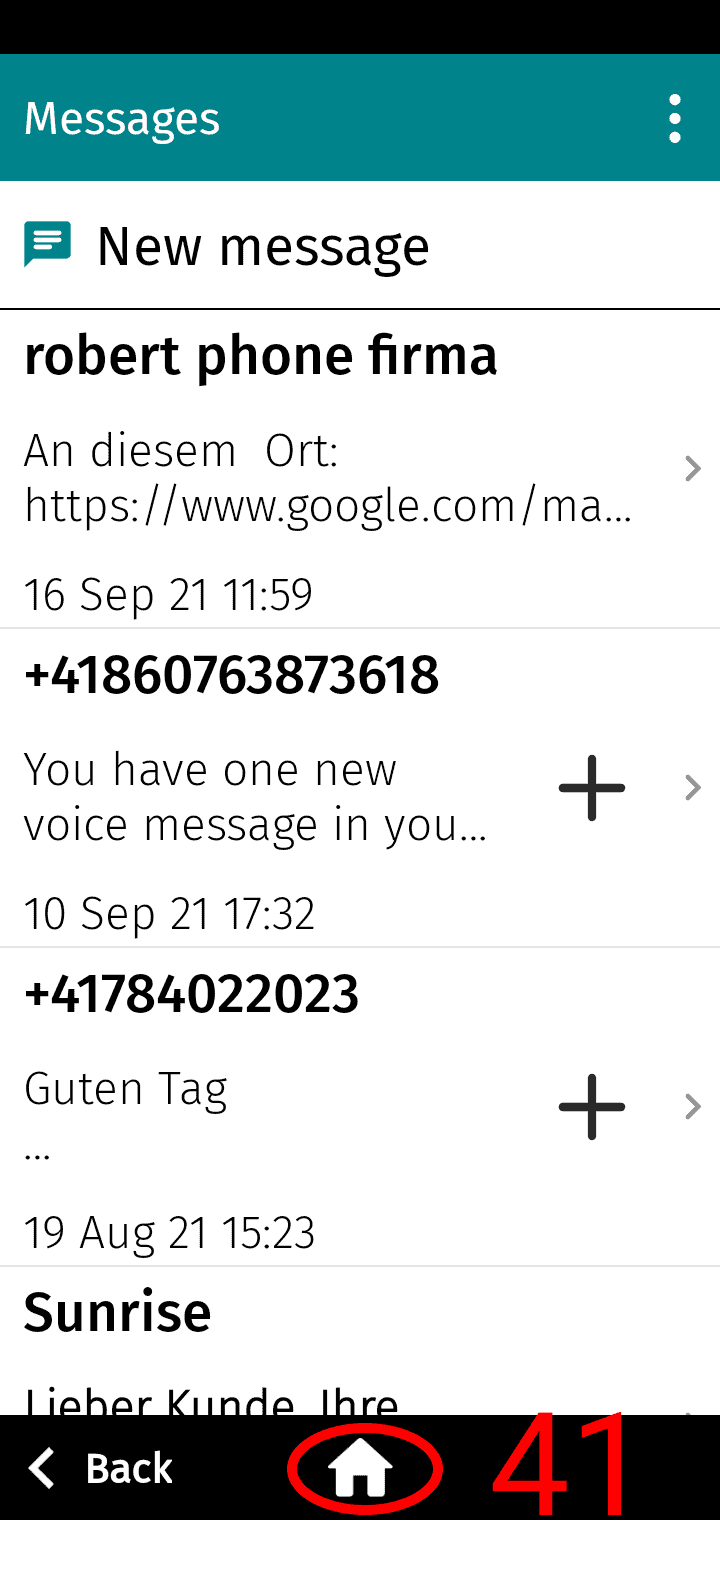
41.
After messages have been imported, use the home button to returen to the home screen
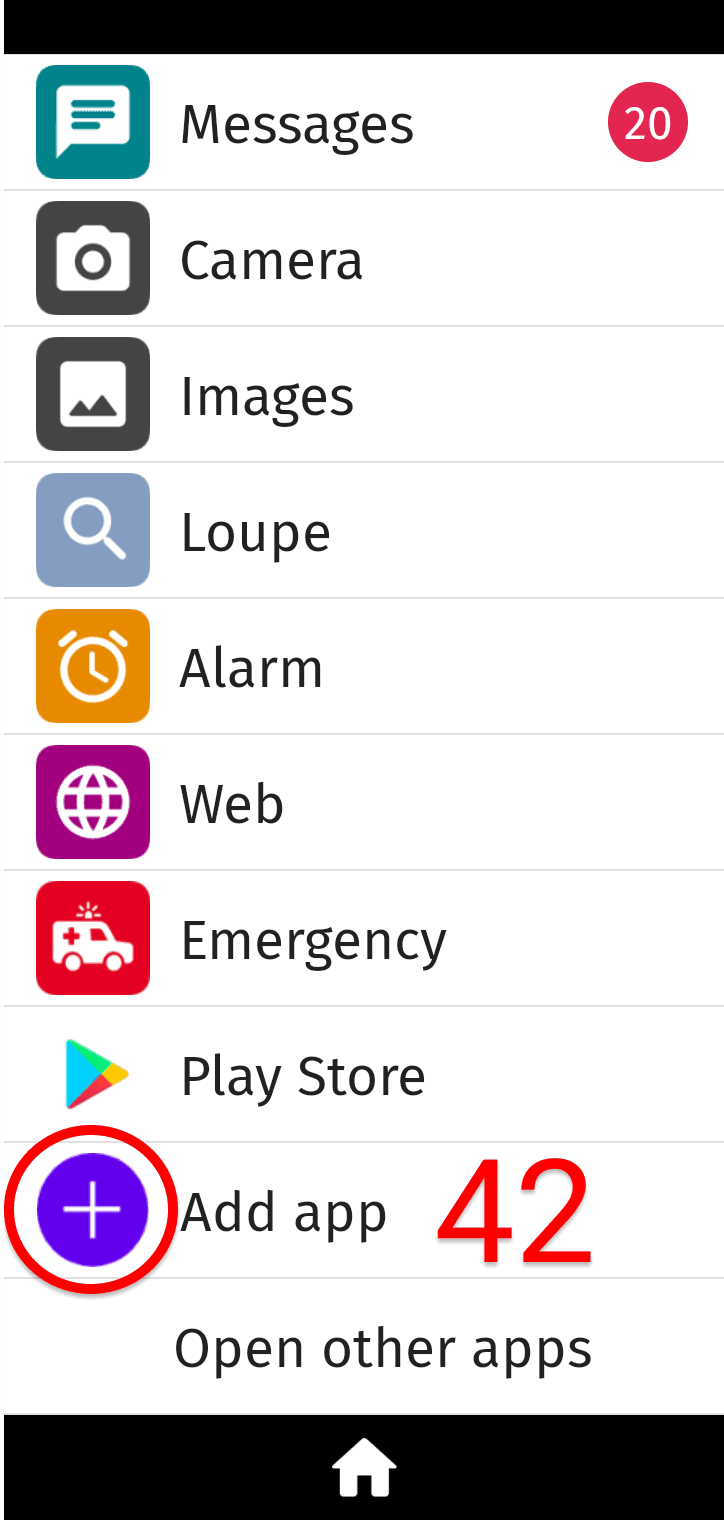
42.
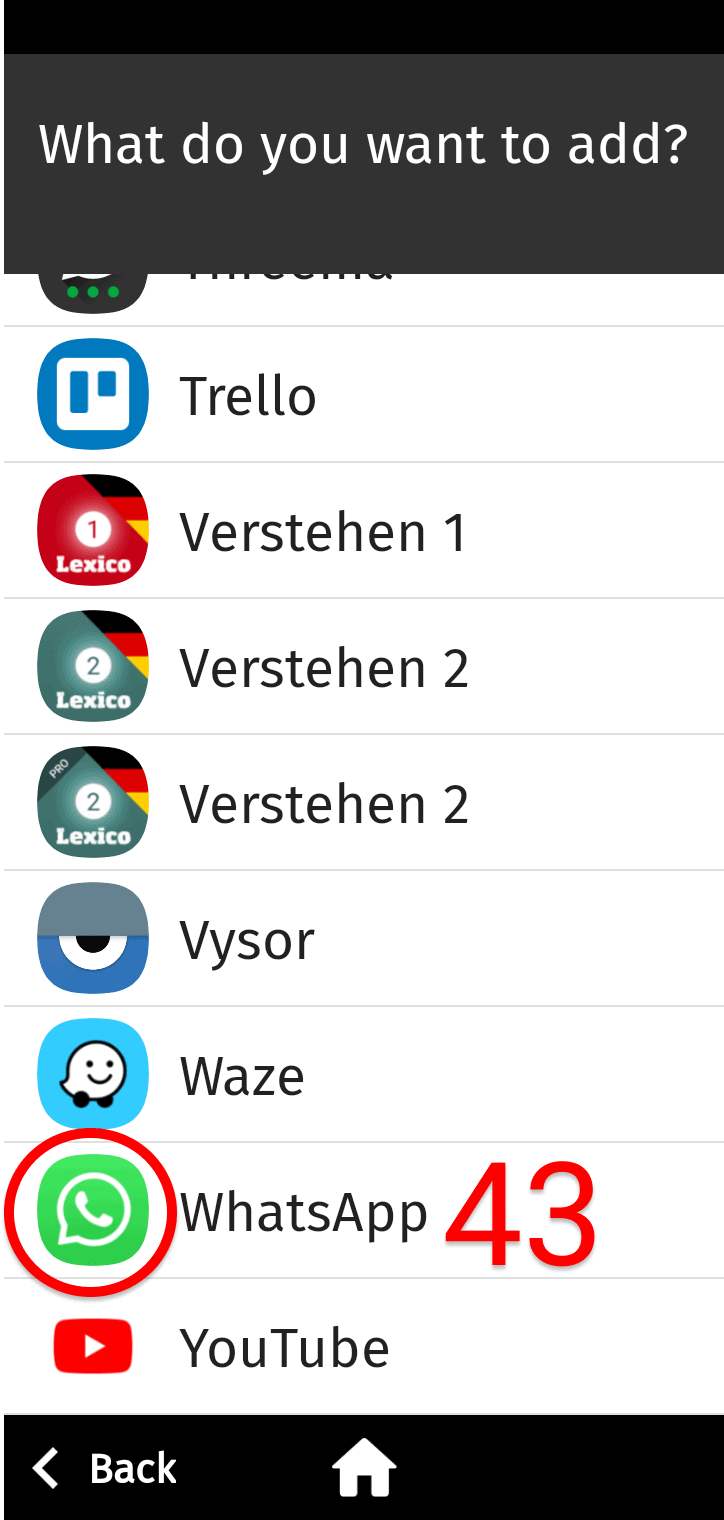
If you would like to add an app to easierphone which is already on your phone, tap + Add app43.
Choose the app to add (in this example: WhatsApp)
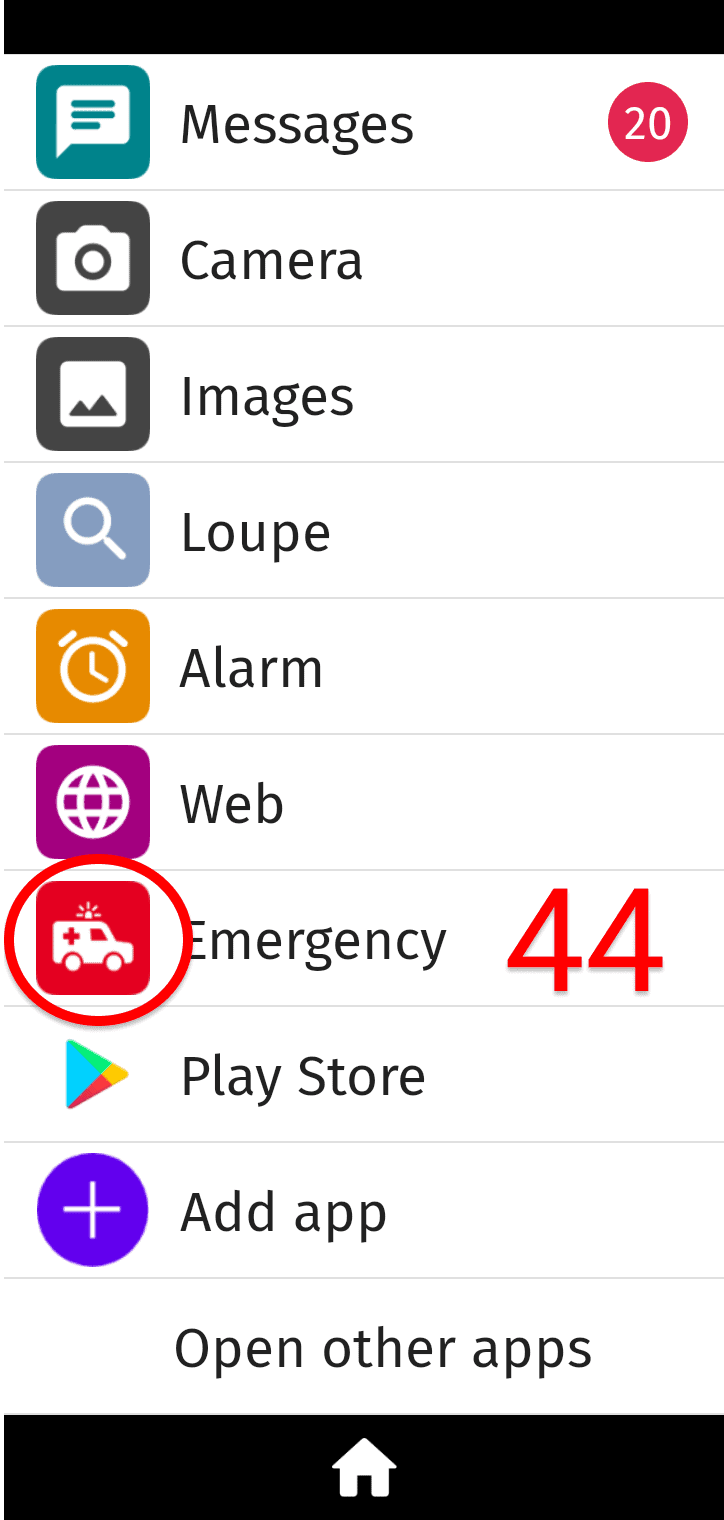
44.
Tap Emergency to set up the emergency button. *
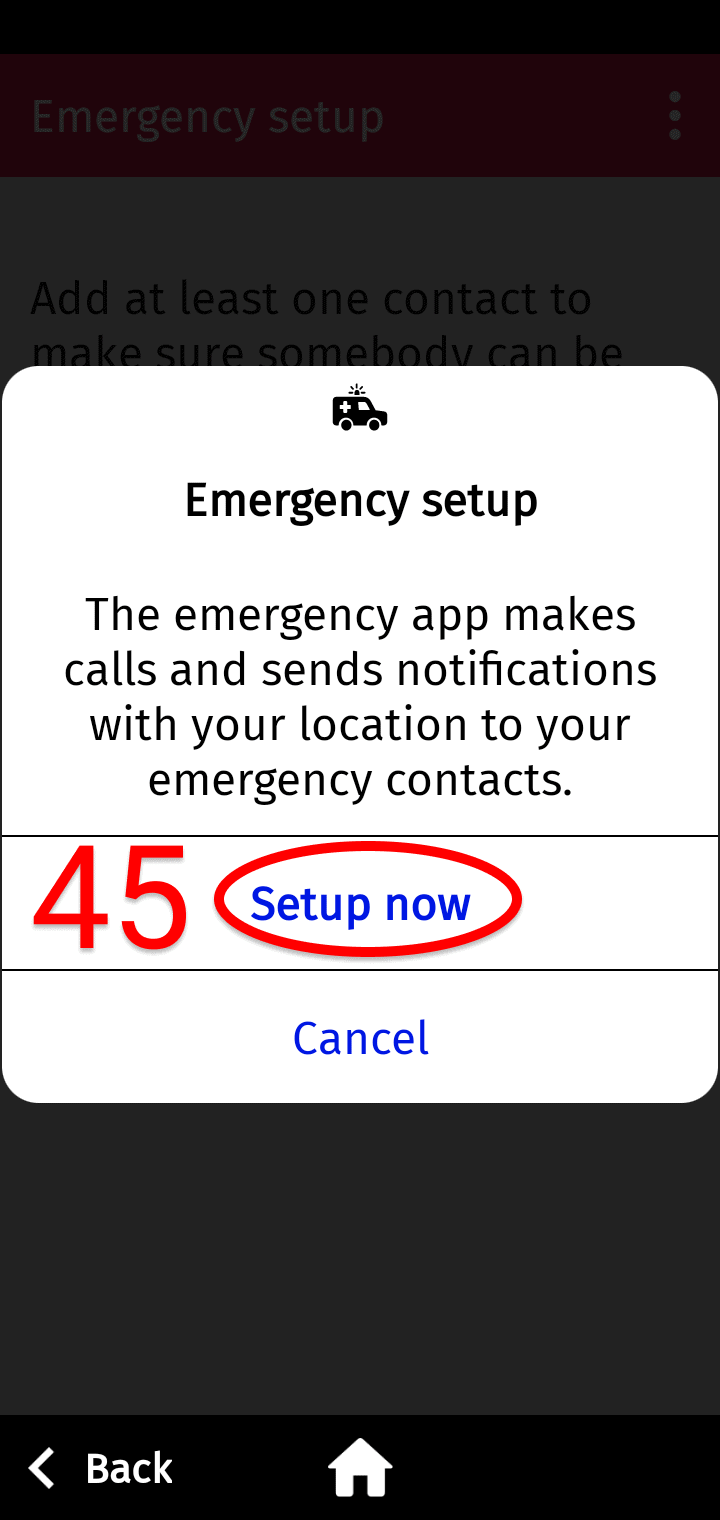
45.
Tap Setup now
*The setup assistant will only appear if no emergency setup has been made. Once the emergency setup has been made, pressing the button will start an emergency call.
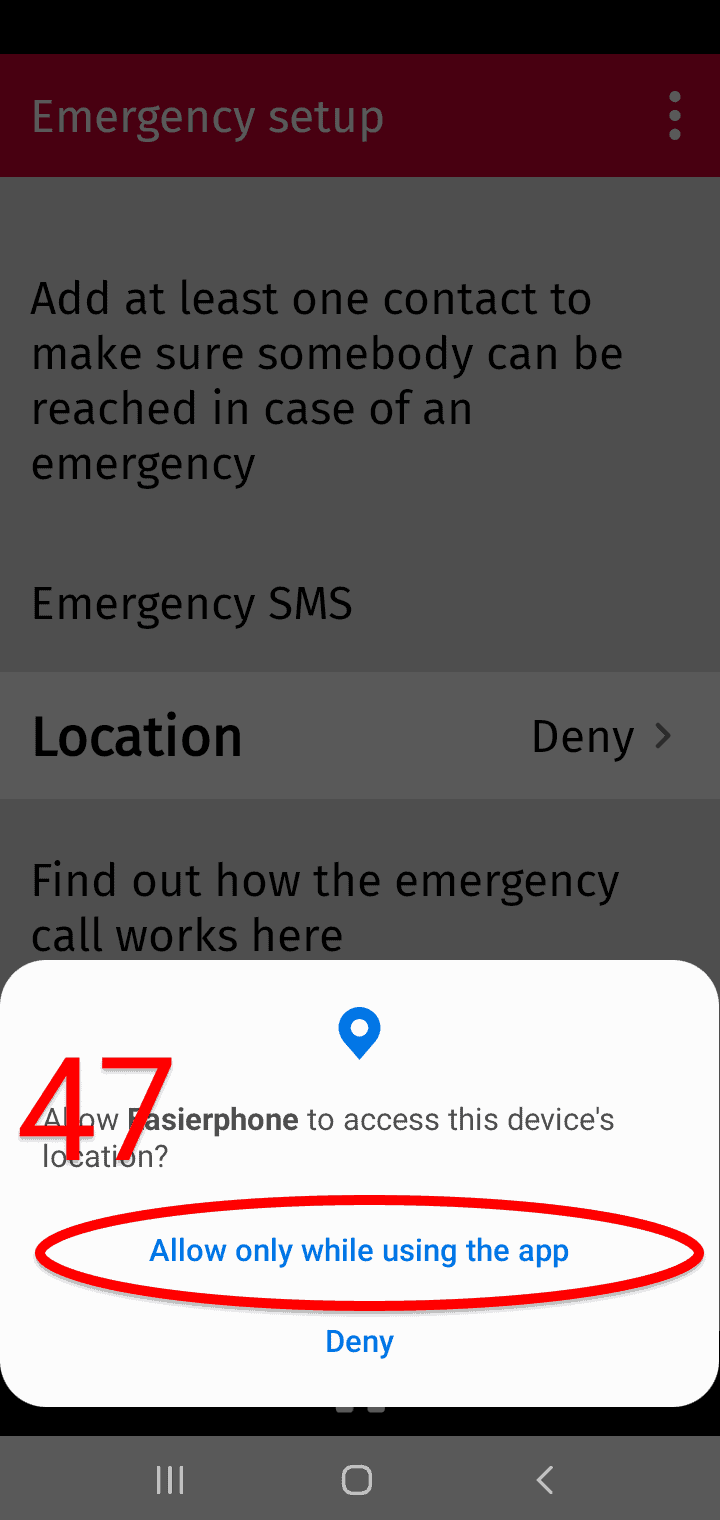
46.
Tap Allow location permission*47.
Tap Allow only while using the app
*the location permission only used to share your location with your trusted contacts when you make an emergency call

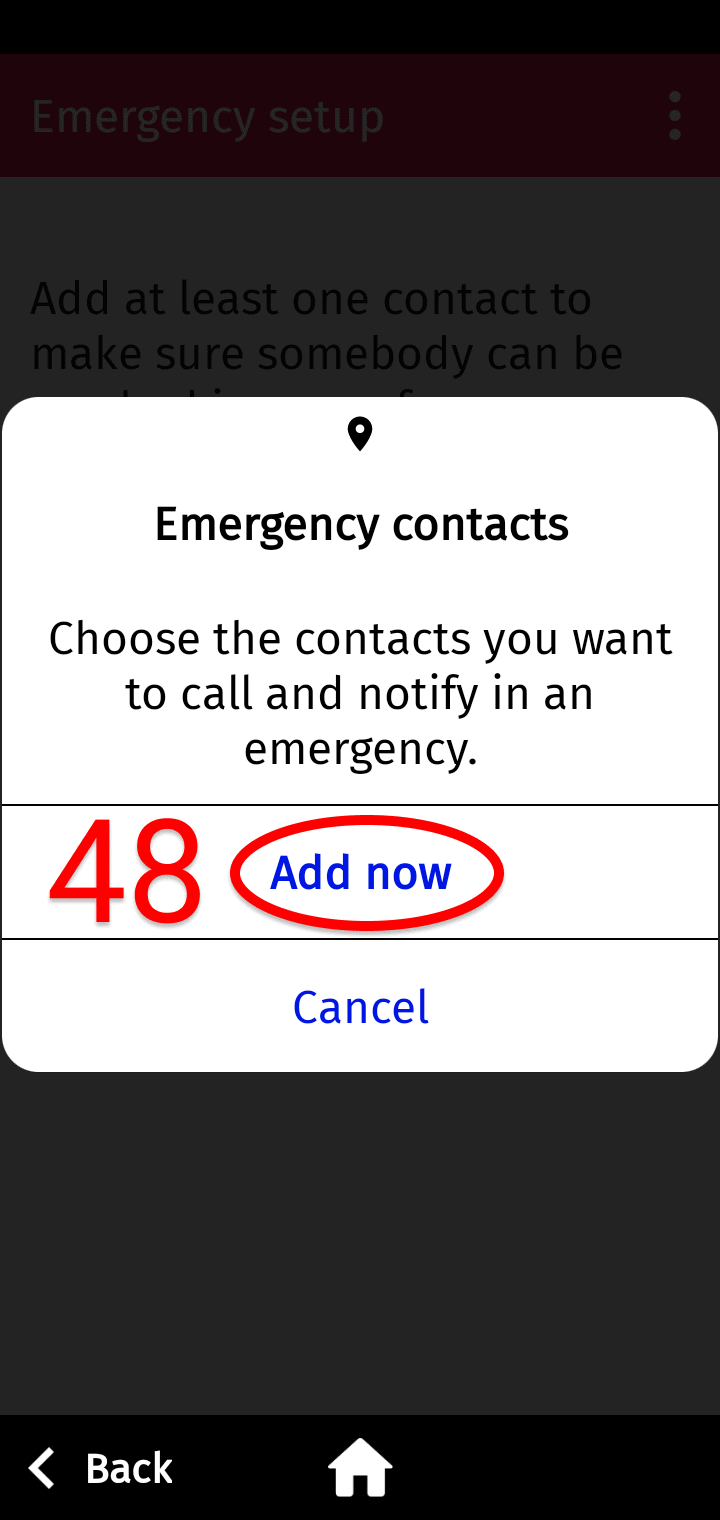
48.
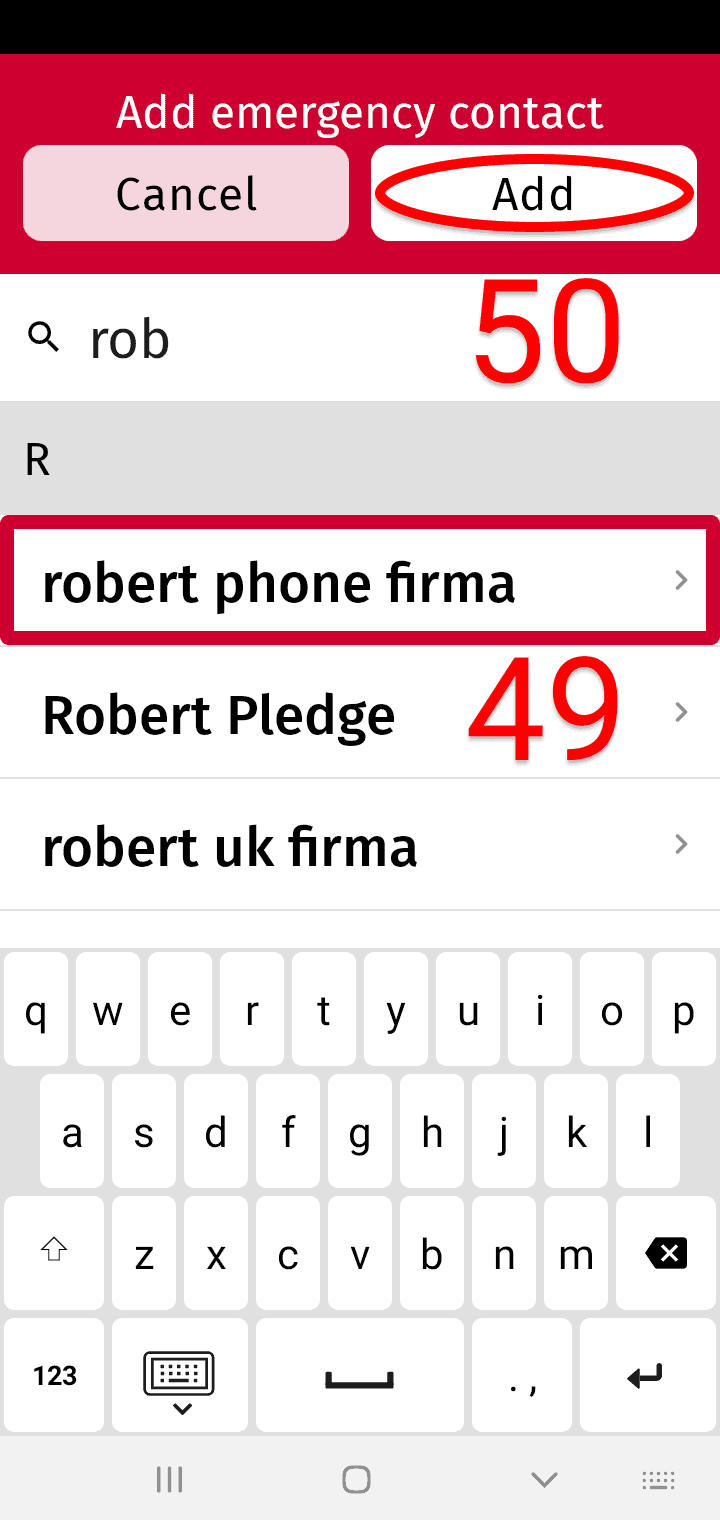
Tap Add now49.
Select a contact by tapping it (a red border appears around it)
50.
Tap Add to add the contact to your emergency contact list
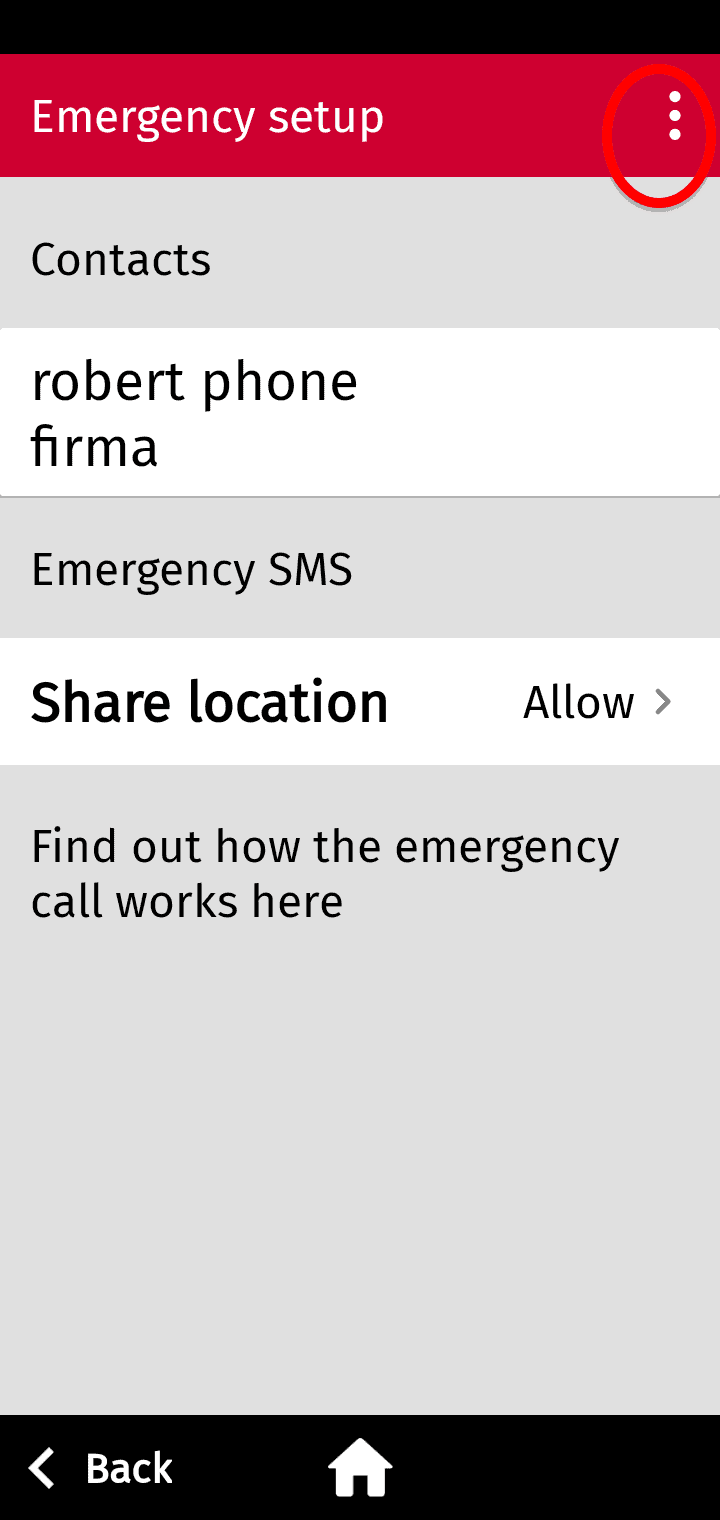
W menu hamburgerowym można dodać dodatkowe kontakty alarmowe
Gratulacje, udało Ci się skonfigurować Easierphone. W razie jakichkolwiek pytań prosimy pisać na adres support@easierphone.com.